denwood
Well-known member
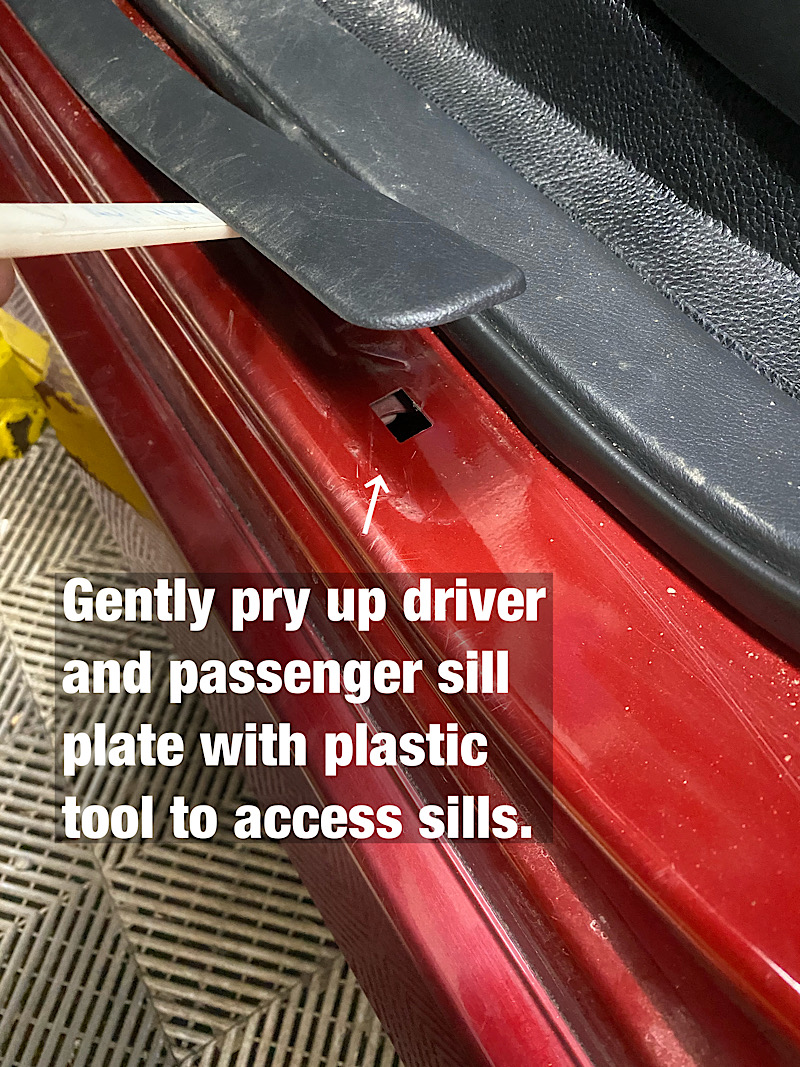
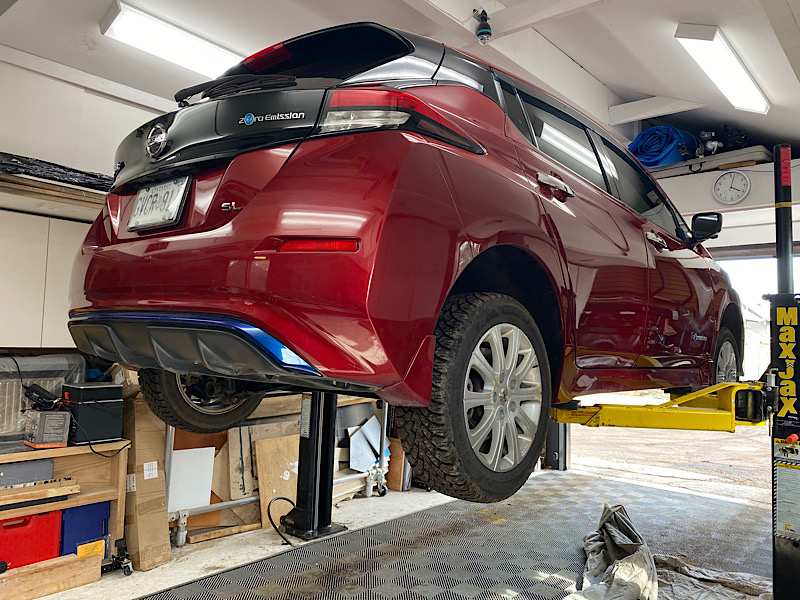
On the agenda is a the winter to summer tire swap, final drive oil change (no other oil in an EV!), brake service, corrosion management, and trailer hitch install. This is the first hoist for the new to me 2018 LEAF SL, shown here with some rather pedestrian studded winter rims and tires/TPMS sensors that came included as an extra with the car. I'm not a fan of these alloys, but hey, they are fine for winter use. The main topic here though will be removal of the fender liners and under body panels to deal with corrosion control, a necessary evil for our climate here with cold winters and salt/sand used liberally on the roads.
This is my first look underneath since purchasing the 2018 LEAF SL a few months ago. It came from a driving school so was driven almost daily, and came to me with about 36 000 miles on the odometer.
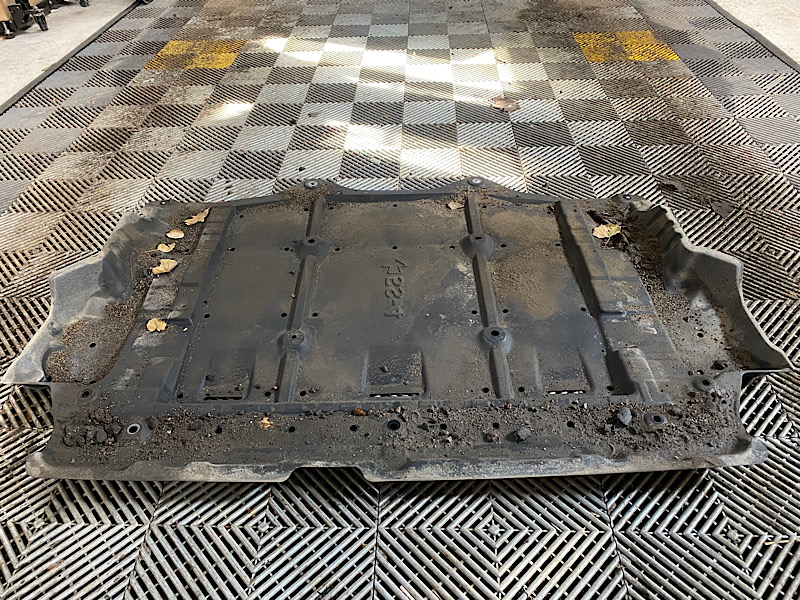
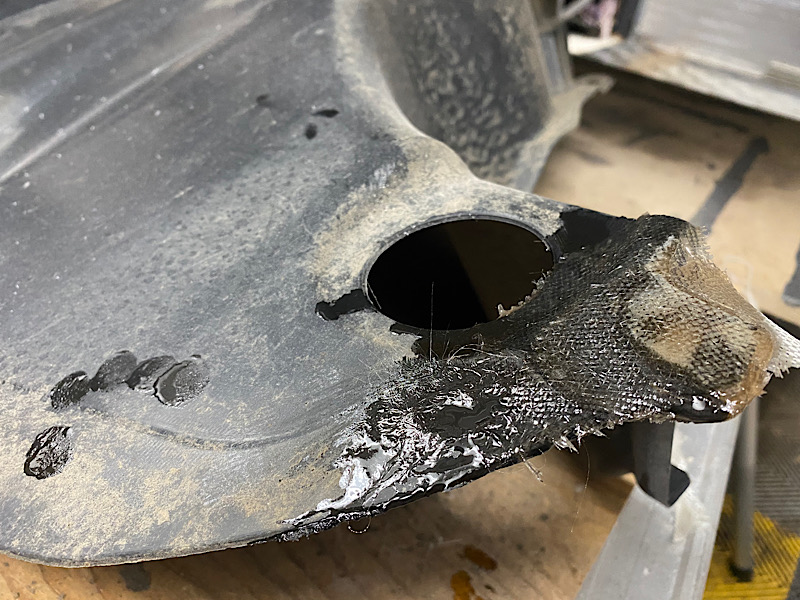
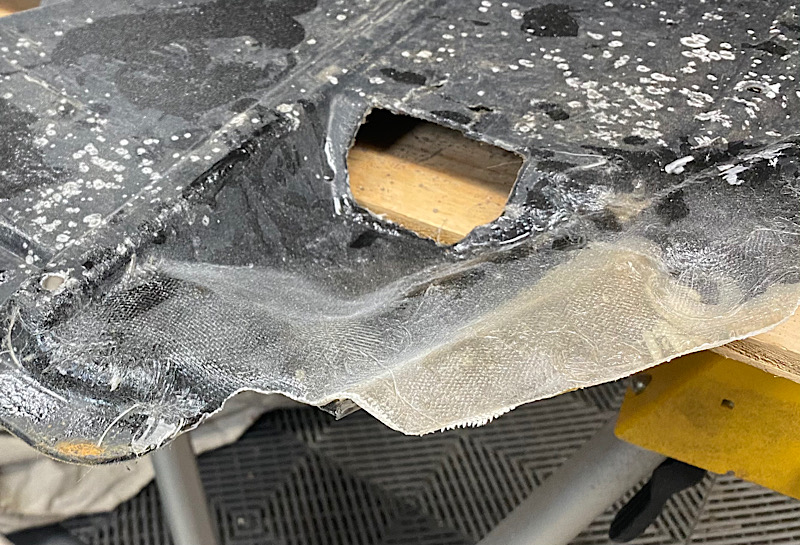
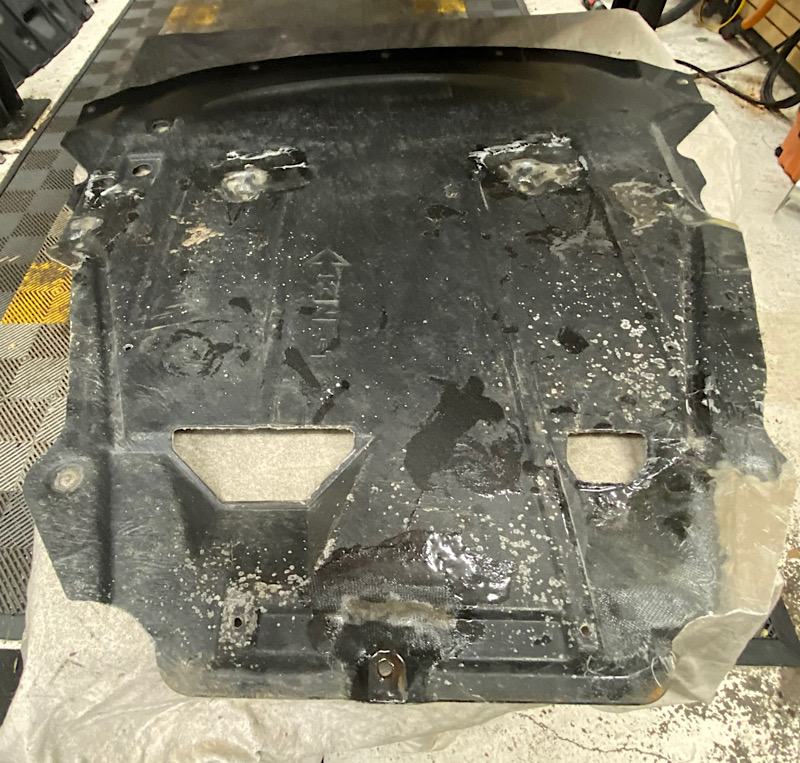
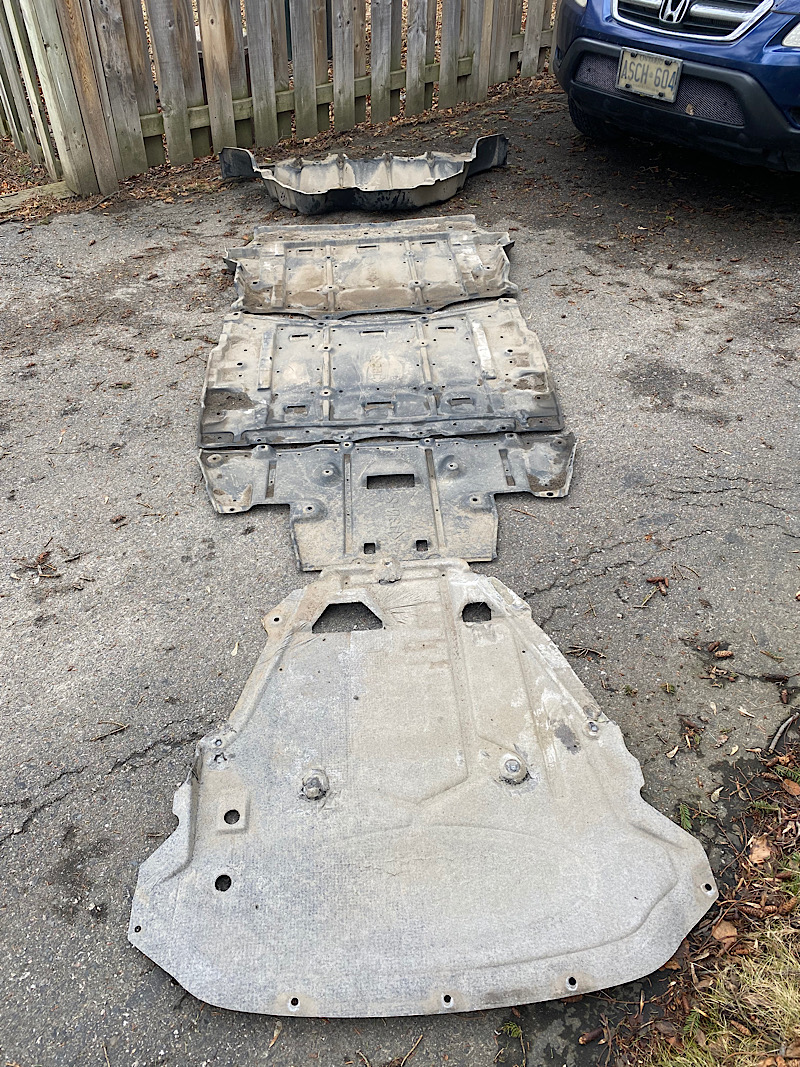
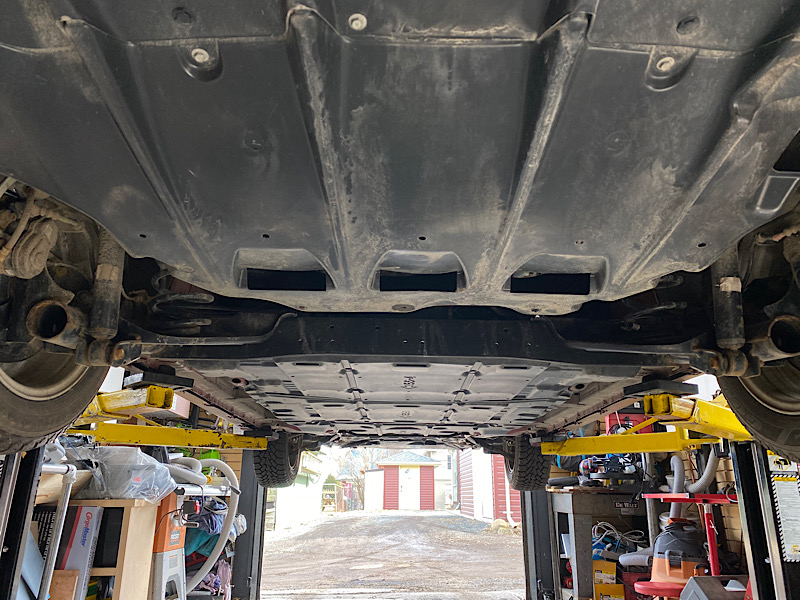
You can see there's not much looking underneath as most of it is enclosed in three plastic belly pans. The front shield has taken a few hits, and one corner will need some repair. There is some evidence of rocker guard (permanent application) in a few areas (under the rockers) but it is curiously spotty..almost like it was a cursory spray by techs who were not concerned about coverage. More pics later on that.
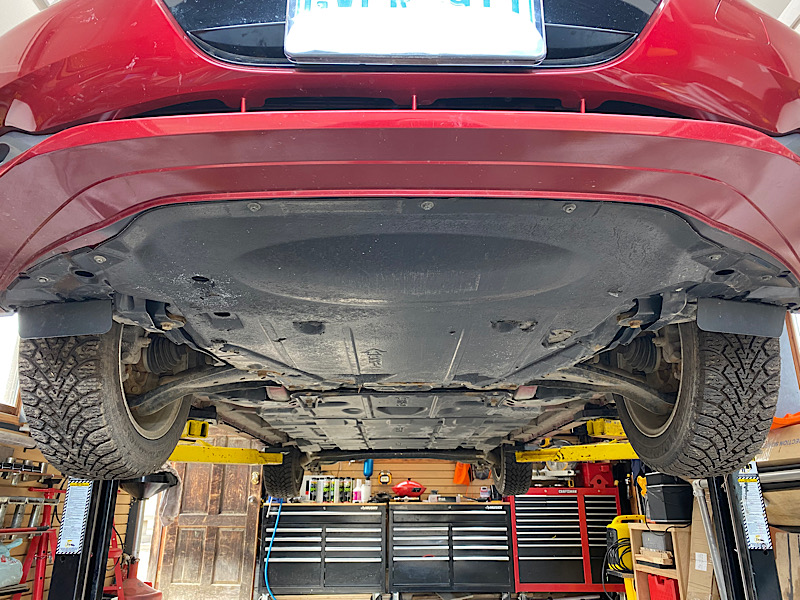
Looking from the back, you can see Nissan has incorporated a few vents on the panels to prevent excessive air pressure between the chassis and panels which would no doubt just blow them out. They are just plastic/fiber.
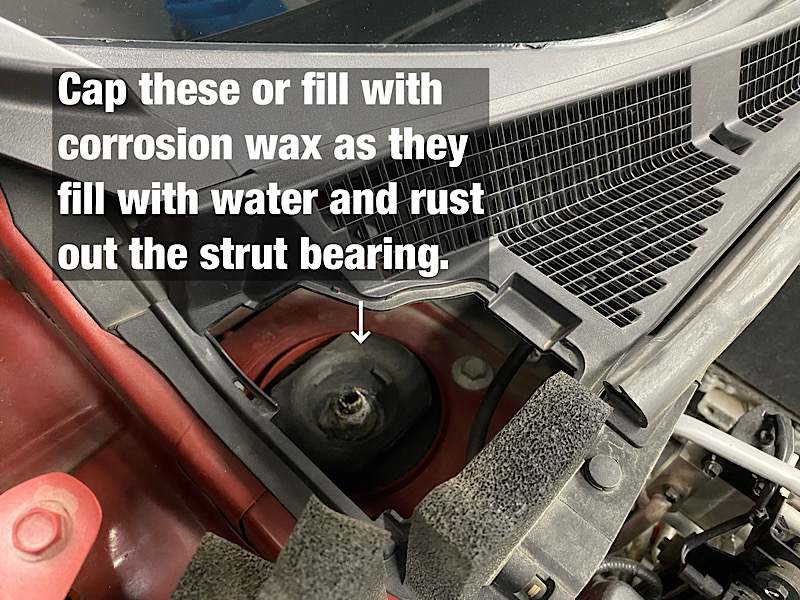
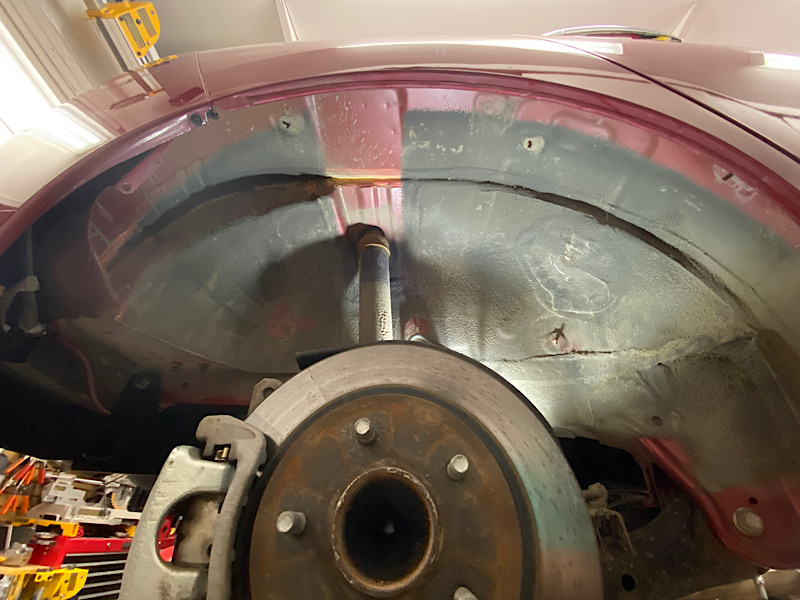
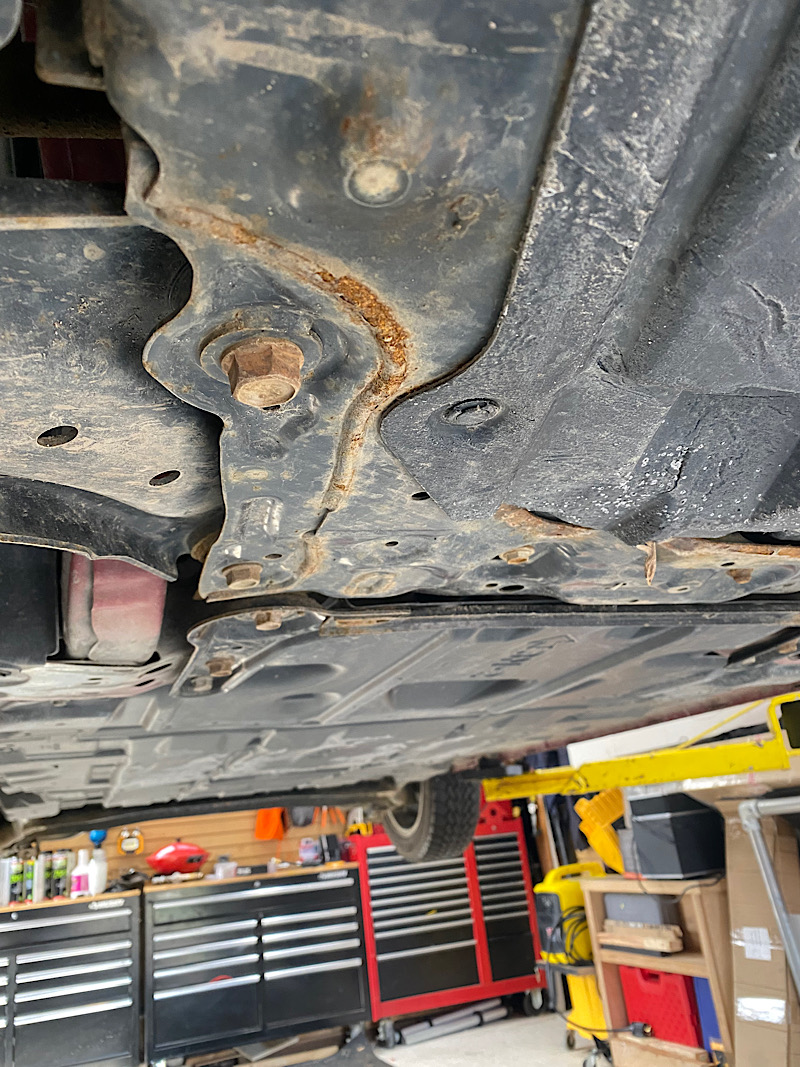
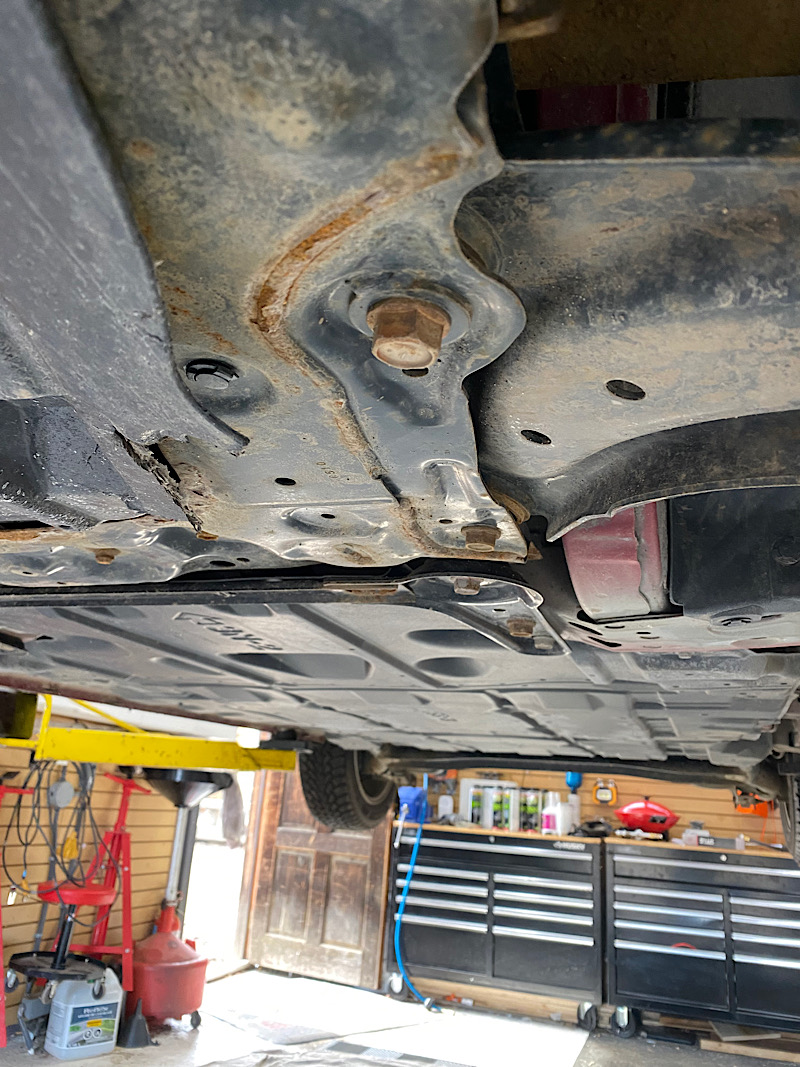
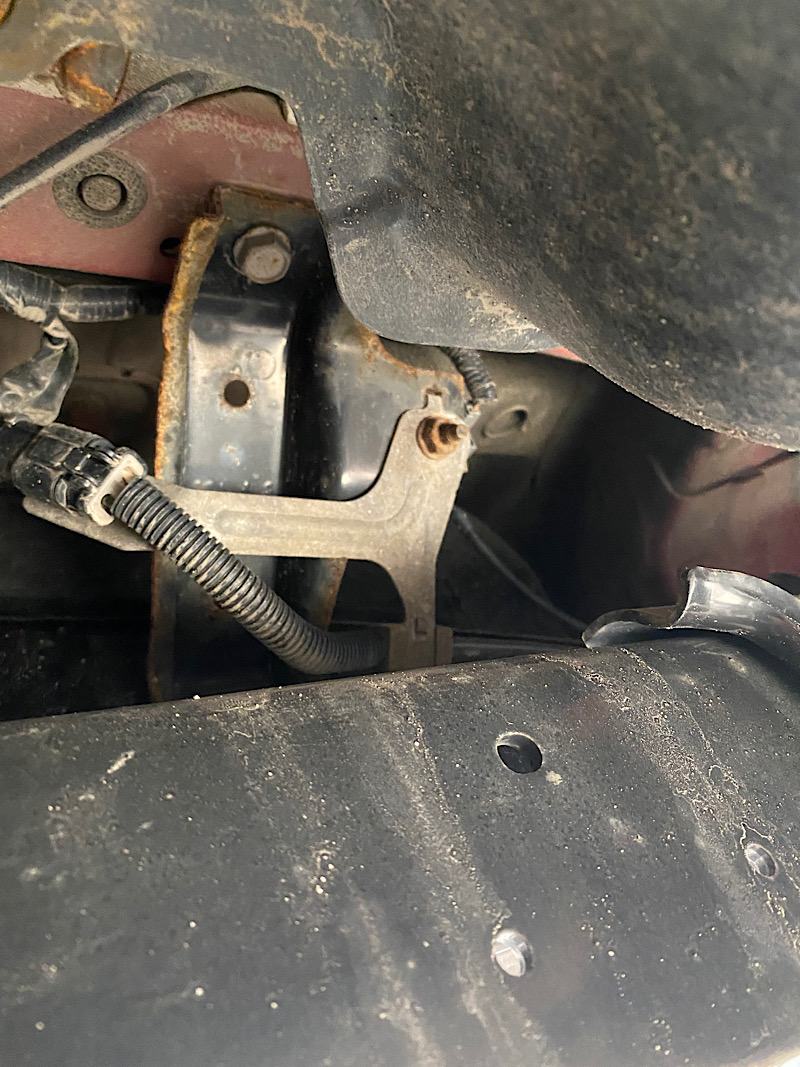
This vehicle has 58 000 kms (36 000 miles), and is already showing corrosion at the typical areas. More pics later on that. The first two pics are at the front A arm and main motor support sub frame.
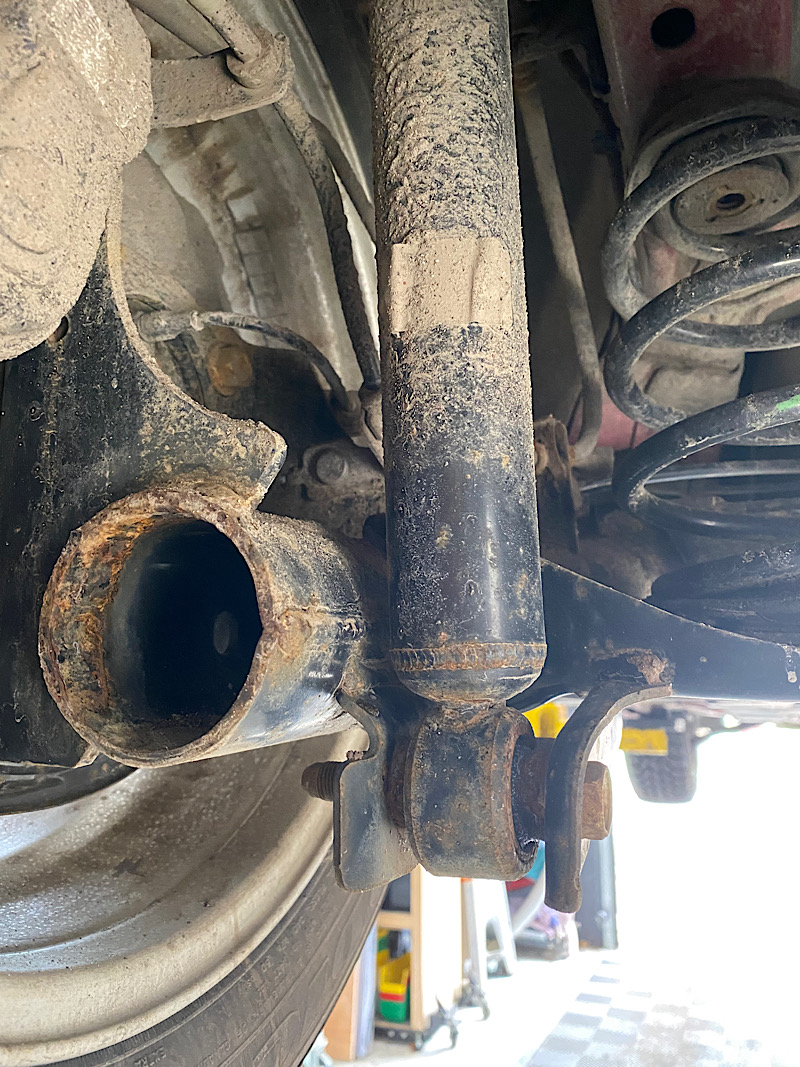
These pics are from the rear suspension area:
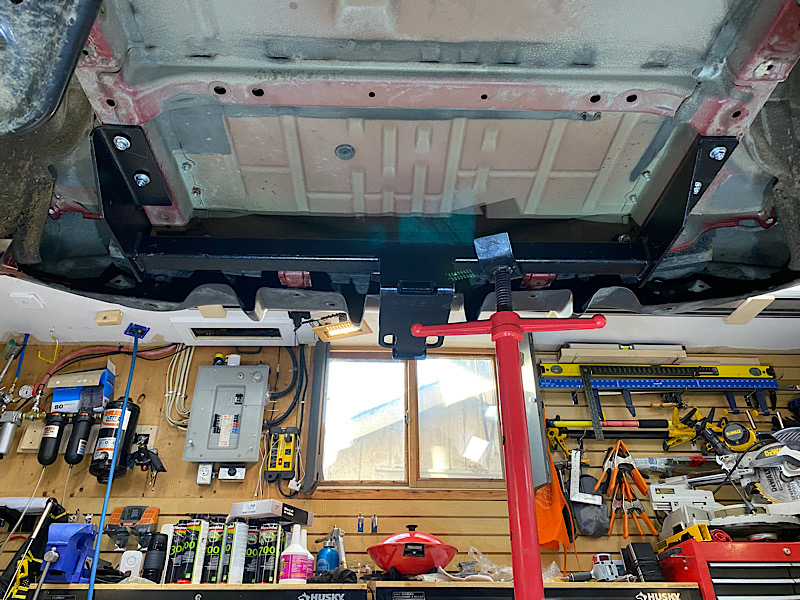
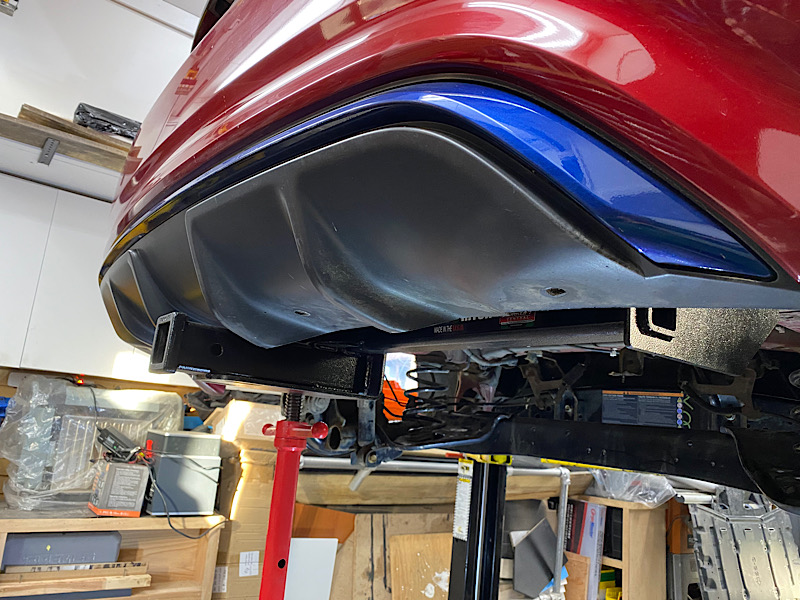
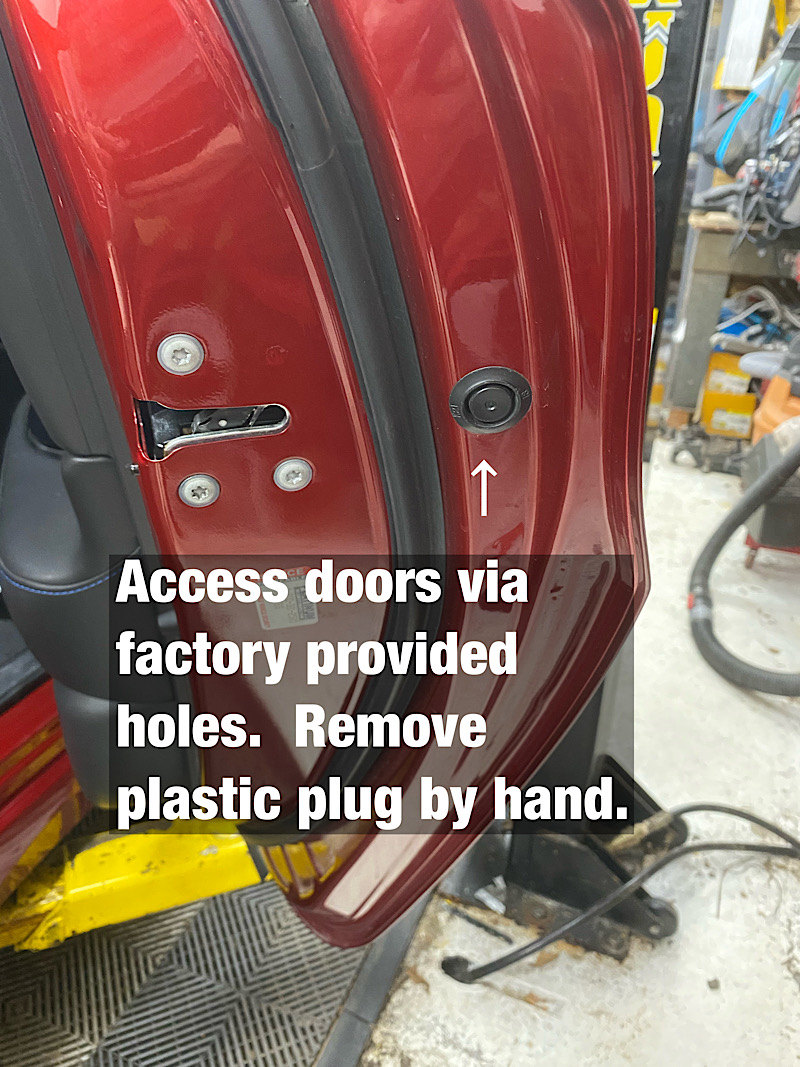
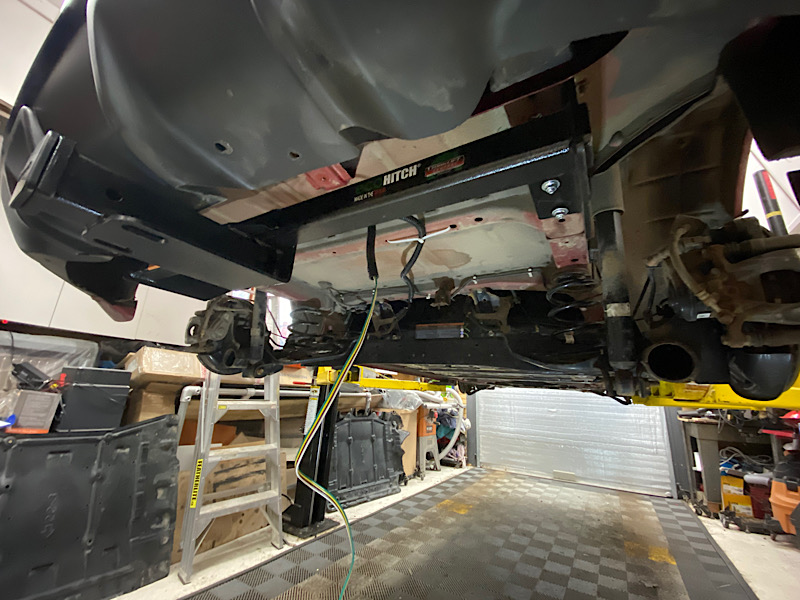
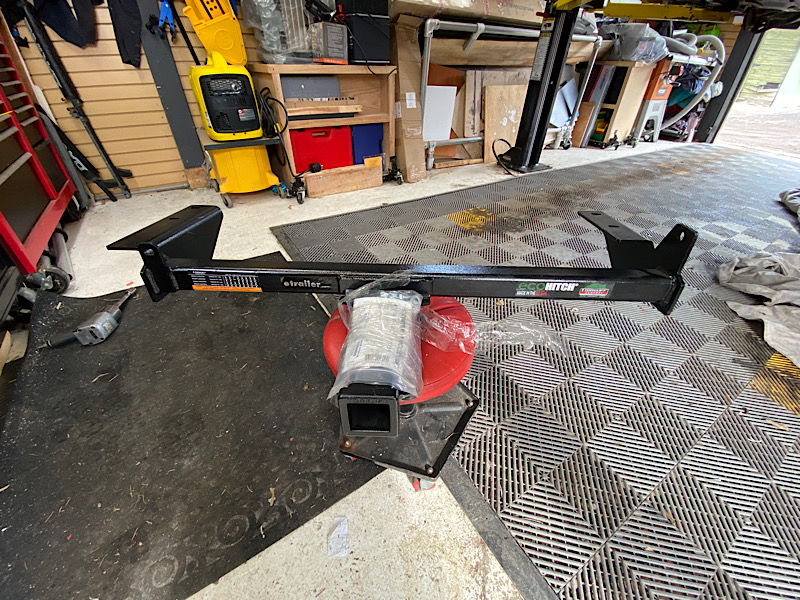
This rather beefy "Ehitch" is one of the only hitches out there for the later model LEAF with a 2" receiver. It will be used mainly for carrying our mountain bikes, but I also will tow a small trailer occasionally. The hitch is rated to 2000lbs, and 300lbs tongue. I'll run separate power for the tail light kit (also from etrailer) from the 12volt battery up front while the belly pans are removed. I makes sense to do a job like this at the same time as corrosion control as it requires some wiring, and removal of the rear pan anyway.
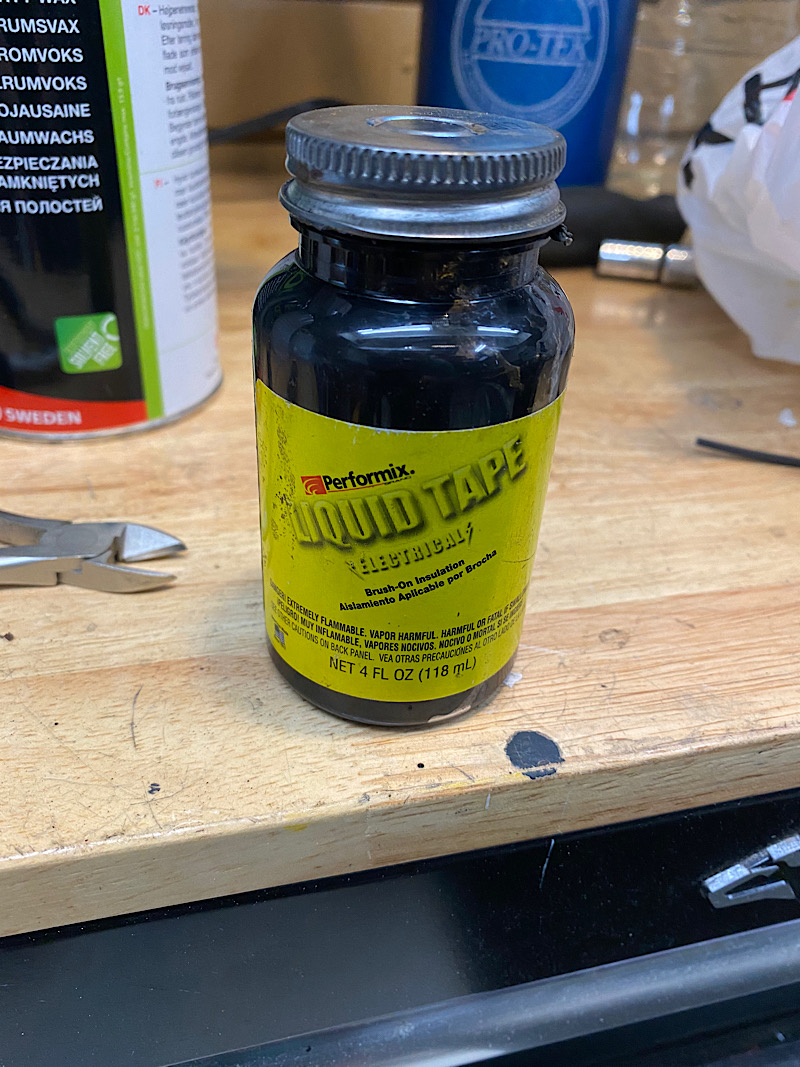
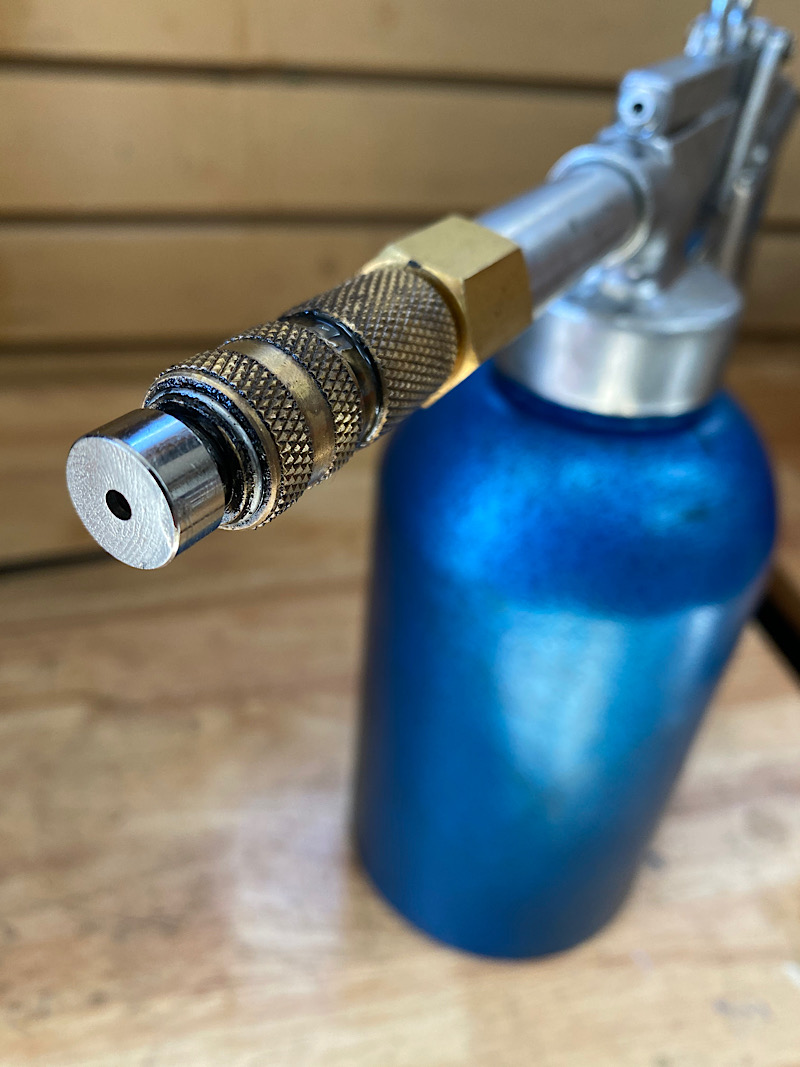
This pressurised "ProTek" cavity gun has interchangeable tips so I use a collection of wands, and flexible 360 sprayer hoses etc. to cover the hard to access areas. I run it at 60 PSI and with Noxudol there is very little over spray and zero fumes.
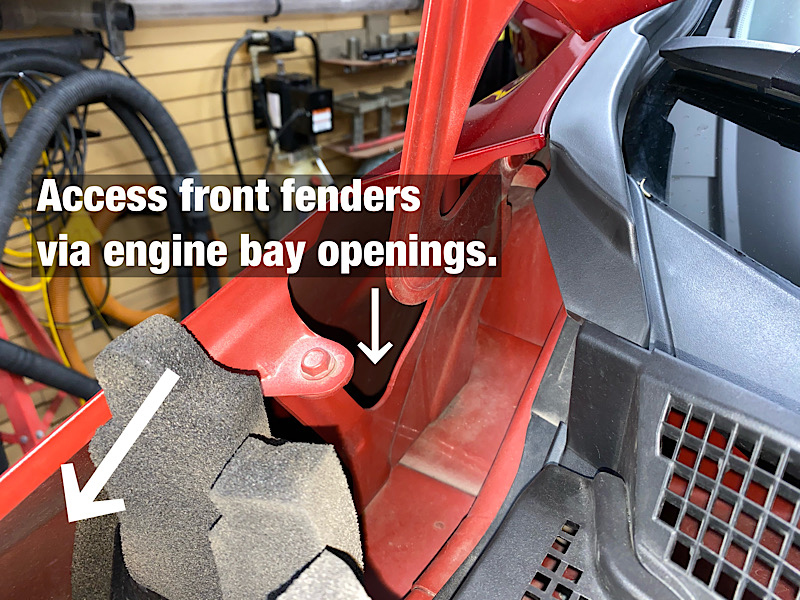
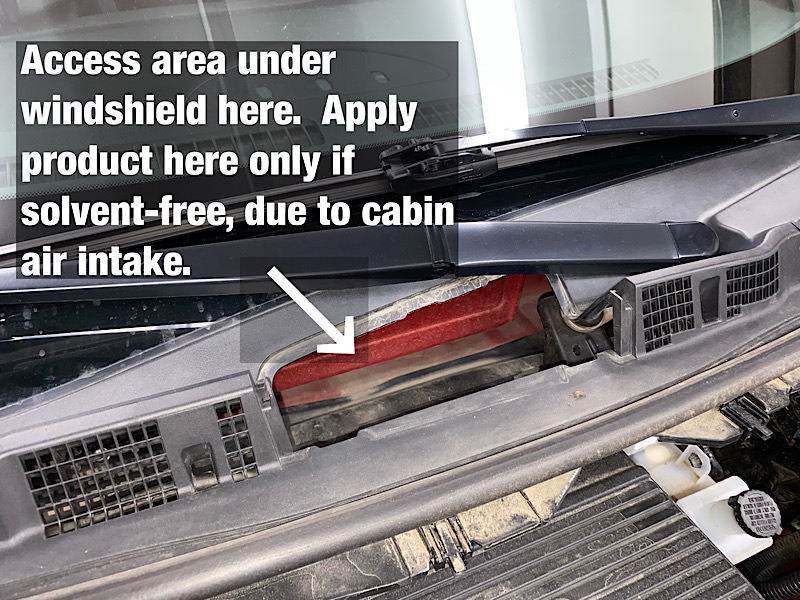
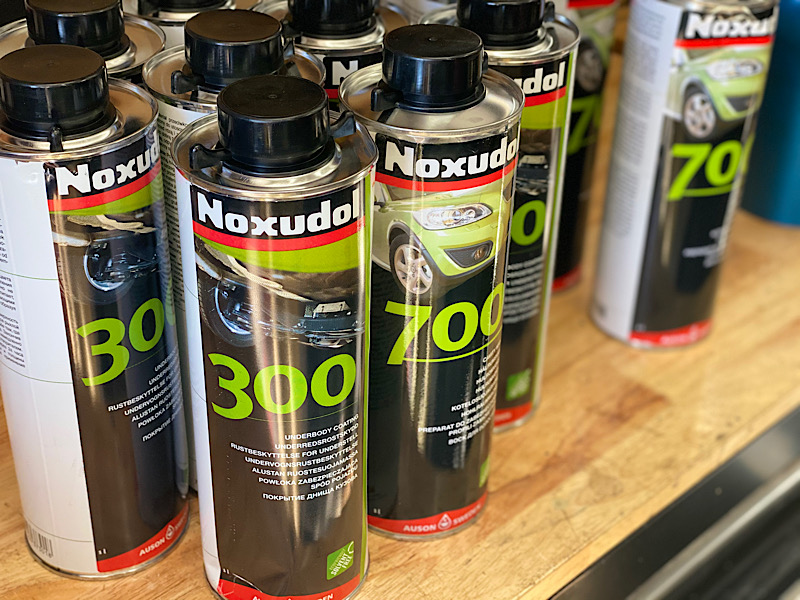
I'll be using Noxudol 300 (black, heavier body for chassis) and 700 (clear, penetrates seams etc. for inner panels, or non exposed areas). This material has zero solvents so no fumes, but it does contain a number of chemicals that actively react with rust. It stays flexible, like a wax, and never hardens. After 3 years on our Highlander, it only required a few touch ups on high exposure areas on the chassis, so does not wash off in a few minutes of water exposure, like Rust Check or Krown.
This is my first look underneath since purchasing the 2018 LEAF SL a few months ago. It came from a driving school so was driven almost daily, and came to me with about 36 000 miles on the odometer.
You can see there's not much looking underneath as most of it is enclosed in three plastic belly pans. The front shield has taken a few hits, and one corner will need some repair. There is some evidence of rocker guard (permanent application) in a few areas (under the rockers) but it is curiously spotty..almost like it was a cursory spray by techs who were not concerned about coverage. More pics later on that.
Looking from the back, you can see Nissan has incorporated a few vents on the panels to prevent excessive air pressure between the chassis and panels which would no doubt just blow them out. They are just plastic/fiber.
This vehicle has 58 000 kms (36 000 miles), and is already showing corrosion at the typical areas. More pics later on that. The first two pics are at the front A arm and main motor support sub frame.
These pics are from the rear suspension area:
This rather beefy "Ehitch" is one of the only hitches out there for the later model LEAF with a 2" receiver. It will be used mainly for carrying our mountain bikes, but I also will tow a small trailer occasionally. The hitch is rated to 2000lbs, and 300lbs tongue. I'll run separate power for the tail light kit (also from etrailer) from the 12volt battery up front while the belly pans are removed. I makes sense to do a job like this at the same time as corrosion control as it requires some wiring, and removal of the rear pan anyway.
This pressurised "ProTek" cavity gun has interchangeable tips so I use a collection of wands, and flexible 360 sprayer hoses etc. to cover the hard to access areas. I run it at 60 PSI and with Noxudol there is very little over spray and zero fumes.
I'll be using Noxudol 300 (black, heavier body for chassis) and 700 (clear, penetrates seams etc. for inner panels, or non exposed areas). This material has zero solvents so no fumes, but it does contain a number of chemicals that actively react with rust. It stays flexible, like a wax, and never hardens. After 3 years on our Highlander, it only required a few touch ups on high exposure areas on the chassis, so does not wash off in a few minutes of water exposure, like Rust Check or Krown.
") That's exactly my setup...LED trailer lights. They are much better than the incandescent bulbs. Maybe I'll fire up another thread specifically on the hitch/wiring install and leave that stuff out of this thread for google purposes
That's exactly my setup...LED trailer lights. They are much better than the incandescent bulbs. Maybe I'll fire up another thread specifically on the hitch/wiring install and leave that stuff out of this thread for google purposes