UPDATED- LEAF LED High-Beam upgrade

My Nissan Leaf Forum

Help Support My Nissan Leaf Forum:

This site may earn a commission from merchant affiliate links, including eBay, Amazon, and others.
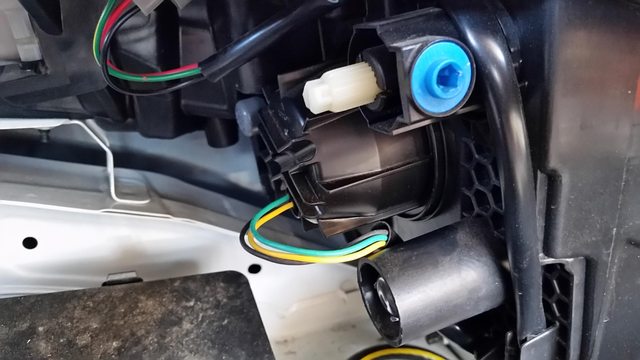
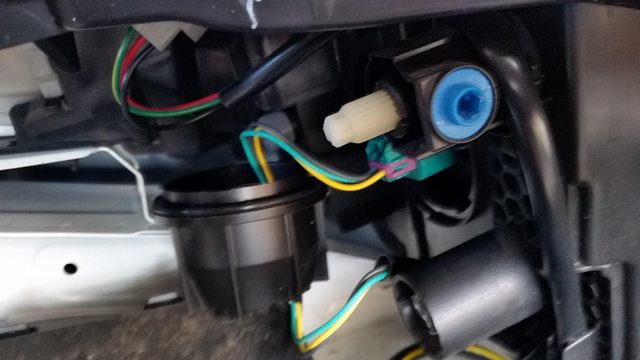
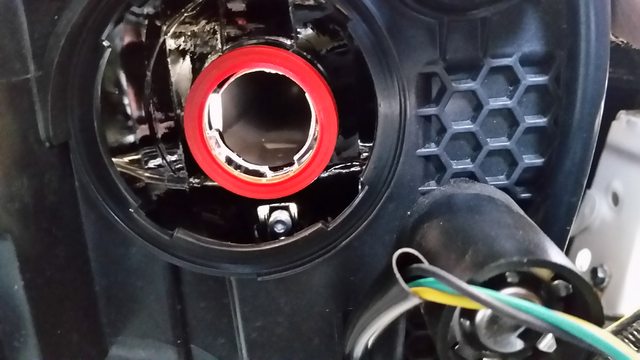
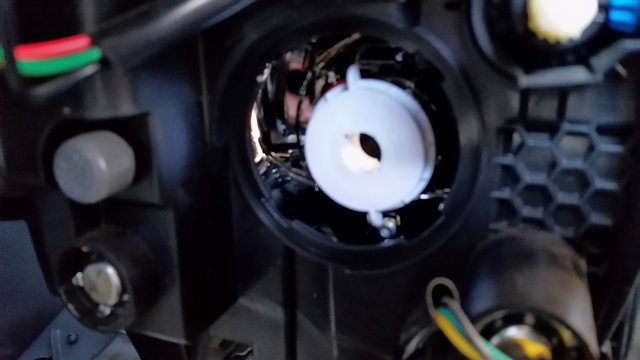
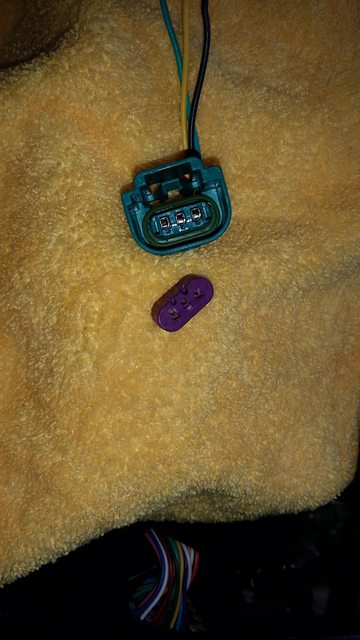
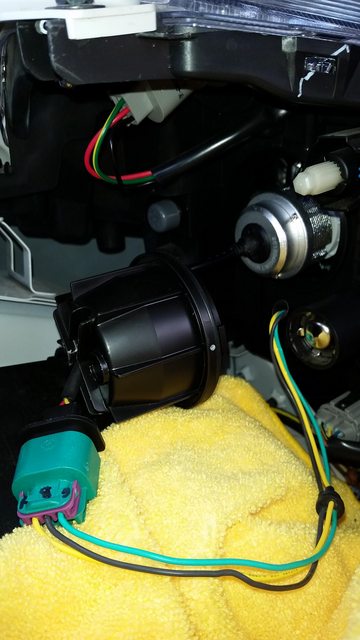
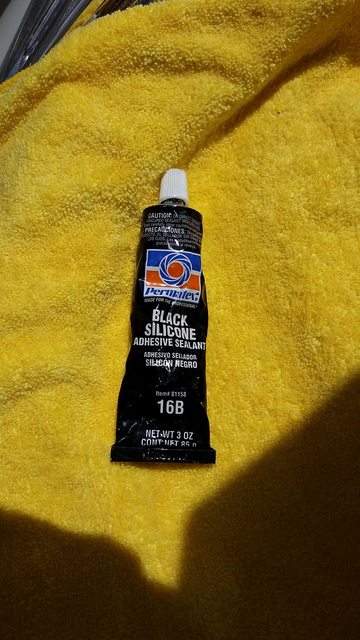
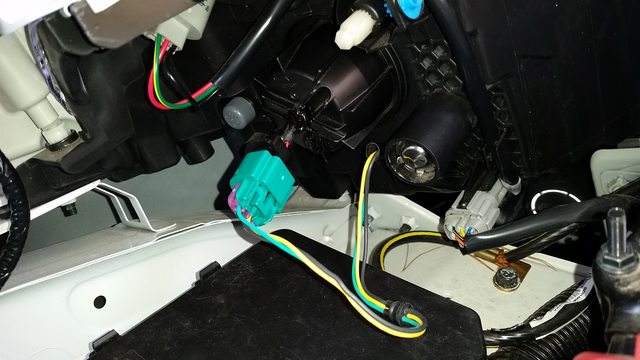
Agkirk, there is plenty of room in the enclosure for the LEDs wiring pigtail. Just route it under the LED lamp in an S shape forward and then back to mate with the stock connector. The pigtail is covered in a high temp silicone rubber, so it will not be in danger of melting. Besides the bulbs heat sink only get up to about 150 degrees, but never the less route the wires so they don't touch the heat sink. Everything will fit inside just fine.

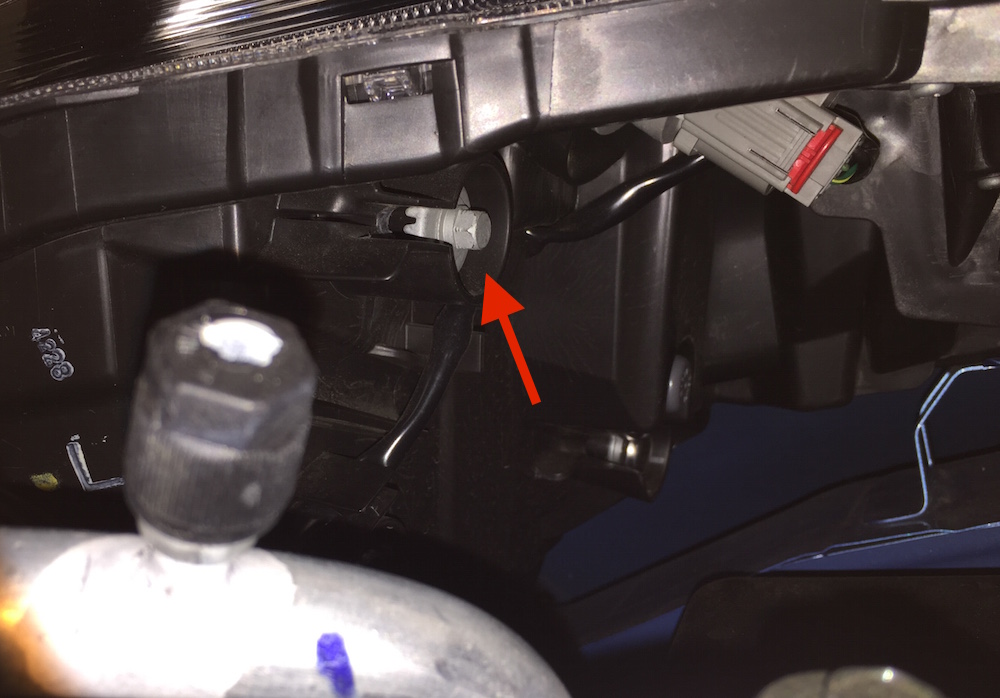
As far as beam adjustment there is an 8mm adjustment bolt on the upper rear of the enclosure that moves both the low and high beam assembly up and down. Usually the right side is too low, but either way it is adjustable to suit your needs.

leafledlights-15.JPG


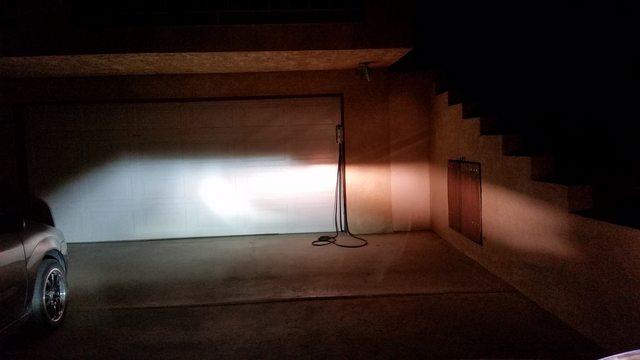
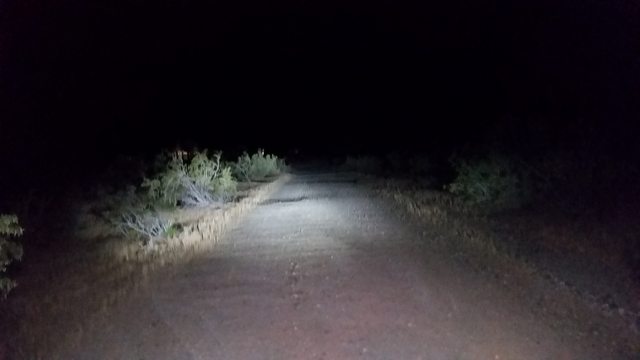
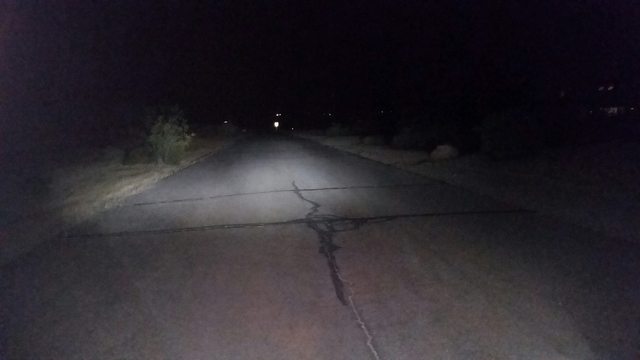
69800, my before and after photos are a little bit deceiving as I don't have the car pointed straight on the road. It's pointed a bit to the left, hence the trees on the left are illumated, and the ones on the right aren't. This does go to show that the beam width is pretty narrow.
 
On the 2015 LEAF S the dust cap is too shallow, measuring 1-3/4 deep, just enough clearance for the back of the LED heatsink and cable exit but not the DELPHI 3-pin H13 connector body.

I'm still looking for the right pin release tool for this connector.

I tried the driver side LED last night and was satisfied with its performance. Nice white color when compared with the passenger side light in photos. (wait---I don't know how to insert photos! help)

I really appreciate OrientExpress's photos and would like to know how he did the hi beam low beam animated post as well as the neat arrows.
 
Agkirk said:
On the 2015 LEAF S the dust cap is too shallow, measuring 1-3/4 deep, just enough clearance for the back of the LED heatsink and cable exit but not the DELPHI 3-pin H13 connector body.

Can you post a photo of the enclosure? I'd like to see what you are describing as it looks like there was a redesign of the enclosures from the 2014 to the 2015 cars.
 
Agkirk said:
I really appreciate OrientExpress's photos and would like to know how he did the hi beam low beam animated post as well as the neat arrows.

Thanks for the kind words. So the animation is a GIF that I made in Photoshop. It has some really nifty animation tools in it that allow things like this to be made. I use a Mac, and there is an application called "Preview" that has some basic photo editing tools, and also annotation tools like arrows, text, boxes etc. Quick and easy way to markup photos.
 
I have photos but have been unsuccessful in posting them. They are JPEG under 1MB each. I see the Img widget but suspect I need a different format as a copy and paste of the JPEGs hasn't worked.
 
Agkirk said:
I have photos but have been unsuccessful in posting them. They are JPEG under 1MB each. I see the Img widget but suspect I need a different format as a copy and paste of the JPEGs hasn't worked.

I just noticed on your signature that you have a LEAF S. If that is the case you need H13 bulbs not H9s. And yes the enclosure is different. You car has halogen low and high beams.
 
I've ordered a release tool for the DELPHI 280 connector, which seems to be the type use in my 2015 LEAF S. I'll post photos of this models install of the H13 LED module (when I figure out how to do photos!). it will take about a week.
 
posting pictures.

sign up with http://www.imgur.com" onclick="window.open(this.href);return false;

drag drop picture into imgur.

click picture.

on right you have different "methods of access" to the picture you want the one 2/3 the way down bbcode I think

IMG surrounded by brackets and a jpg file. use "large thumbnail" for posting here it is the perfect size.

8bDQM8ml.png


https://www.youtube.com/watch?v=gK5kiSr5TgA" onclick="window.open(this.href);return false;
 
A really good LED does not have lots of heat sink for dissipation of the energy wasted in generating light.

I'll wait for low energy LED with little to no heat conversion waste.
 
NNichols. you are simply unaware of how LED's actually work.

an LED is a very high heat generating device. 80% of the power you put into an LED comes out as heat.

the REASON LED's are known as "low heat" is because most of the LED we are familiar with are such a lower power as to be miniscule at best

80% of near nothing is still near nothing. so we think "low heat"

but once you go from "marking/instrumentation" lighting to "primary" lighting YOU NEED LUMENS and this means POWER.

the BIGGER the heat sink typically the BETTER the led fixture. in fact when I am trolling china for LED's I seek out the ones with the most massive HEATSINKS are they are the most likely to survive.

anything over 100' degrades LED anything over 110' rapidly destroys them (the white ones)

you MUST dissipate that heat. "typically" for standard LED's and "passive" cooling you need 9cm/2 of cooling surface area PER WATT of input power.

do the math. 30 watts input power you technically need 270 square centimeters of passive cooling surface area.

you can "trade" lifespan for less cooling area. which is why most of these are only rates for 10,000 hours and not the typical 50,000 hours or much more for an LED.

or you can add active cooling (a fan) but now you have a failure point.

This is why I seek lower wattage LED's and ARRAY them. to reduce over driving increase efficiency and extend lifespan.

many times I will double the needed number of LED units and then halve the voltage to drop the lumens and watt consumption of each unit so that say 6 will produce the same light as 3

this increases the lumen per watt efficiency and dramatically extends the lifespan (I have 15 year old LED arrays that are still working and these are heavy usage LED arrays IE many hours per day)

you want the lowest wattage per lumen you can get and the LARGEST heatsink you can get. the more the better. longer life.
 
I will take my bulb out and try to reorient it when I get a chance.

check out this great video on led.

https://www.youtube.com/watch?v=hRqxTl4rxlg" onclick="window.open(this.href);return false;
 
nerys

Thanks for the great tutorial on posting pictures. I gave it a try and it worked great.
Awaiting the pin release tool so I can disassemble the OEM connector and pull the wires through the cap, then I'll post a DIY for the 2015 LEAF S and H13 LED. Tried one and things looked better than the halogens.
 
Agkirk said:
nerys

Thanks for the great tutorial on posting pictures. I'll post a DIY for the 2015 LEAF S and H13 LED. Tried one and things looked better than the halogens.

That would be a great! That way we will have both the H9 and the H13 conversion. I might suggest that you show how to do the H13 without redoing the connector in addition to rewiring the connector, and the pros and cons of each method.
 
Today I played with the LED high beams. I tried the different collars that come with them. There is only one way they will go in. The LED squares are more or less at the 12 and 6 o clock position in the housing and fit very nicely but they are pointing up in the air and pretty much useless in my view. The just don't work the reflectors right. Mine is a 2012.
 
Completed the install of the H13 LED headlight modules in my 2015 LEAF S. Bought the release tool for the DELPHI GT 280 OEM connector. Didn't need it! Headlights are now nice and bright. Lot of photos take but will post only a few unless someone wants more.

What I bought.
IL273fql.jpg


fcaF8pvl.jpg


Headlight section of the LEAF.

wwBrGi0l.jpg


z8J47ZGl.jpg


7CeBv3Ul.jpg


Q6tOZZSl.jpg


OEM Connector disassembled.

3LWiHvzl.jpg


Off another web site I learned that the purple cap pops off and the pin latches are easily accessible. Didn't need that $8 tool I waited four days for. Thought I could use it to disassemble the LED adapter cable connector. Two hours later I gave up. Drilled a 7/16" hole in the center of the dust cap.

8UTkYOPl.jpg


Clearance on the inside of the OEM dust cap is just under 3/4" Not enough to get the connectors inside.

A bit of black RTV in the holes and I was done.

4Owk3q1l.jpg


Driver side headlight replaced with LED

jf4ZC1Jl.jpg
 
Nice install, my questions

1 so no way you could get the pigtail connected to the power connector inside the enclosure? Even winding the pigtail around in the housing? Seems like there is space.

2. With the way you placed the connector outside the housing, might it had been easier to just enlarge the existing hole for the pigtail rather than cutting a new one?

3. What did you seal up the holes on the enclosure access door with, and is the stock H13 connector waterproof? If not, how will you deal with making it waterproof?

I'd like to look at the insides of a S version light enclosure. If anyone here in Silicon Valley has an S and would be up for letting me take a closer look at your headlights, please PM me.
 
One would have thought there would be enough room but there is just under 3/4" between the tail of the LED module and the back of the dust cap. Measured when I had the OEM connector out. The connector is just over 3/4" thick and it would have to cross the middle of the module, where the connector adapter plugs in, just not enough room.
Used black RTV

WuuGRsQl.jpg


to plug the two holes. Decided to drill new holes in case the LEDs didn't work out and then I could reuse the dust cap by just refitting the rubber stopper on the OEM cable.

fkpitUol.jpg


There is no access door on my cars headlight assembly just the dust cap.

The stock connector is waterproof but since it is behind the dust cap, which has an O ring seal, doubt is it is necessary. The OEM connector seals to the OEM bulb as though in some applications it may be exposed to the environment.

Low beam
U7HR1JZl.jpg


High beam
EQexM8El.jpg


Wall pattern
avzA5Gel.jpg
 
I just ordered the H9 version for my 2013 SV. I'm leasing, but since it's Plug & Play I'm not worried about that aspect - just things like defective parts and Murphy's Law when I install them. I still have one or two years' worth of extensions left on my lease, and would like good High beams for that period, at least!
 
Well, I pulled the trigger on this one today.

I ordered the LED bulbs from the link here, and installed them earlier today on my 2012.

While I wouldn't call the install "easy", it was plug and play.

Once I tore out all the HID wiring I so lovingly installed 3 years ago, the only problem I had was trying to manipulate that HUGE bulb heat sink through the Little round side inspection hatch.

The HID's were sure bright, and color correct, but to call them diffuse and unfocused doesn't begin to describe the crappy beam pattern.

I haven't had a chance to drive the new LED's yet in the dark, but I will tonight.

Thanks
 
I got my H-9 set today. My SV has the hard plastic dust cover, and I'm not clear on whether I have to leave that off or modify it for my upgrade. Can someone clarify? I thought it was only the S halogen/halogen setup that needed extra work...
 
Back
Top