Adding a Brusa charger under the hood for '11/'12s

My Nissan Leaf Forum

Help Support My Nissan Leaf Forum:

This site may earn a commission from merchant affiliate links, including eBay, Amazon, and others.
Another one for sale.
Join our merry band!
http://www.ebay.com/itm/BRAND-NEW-Brusa-NLG513-U1-O1-3-3kW-Charger-NIB-/251285840410?pt=Other_Vehicle_Parts&hash=item3a81cda21a&vxp=mtr" onclick="window.open(this.href);return false;
 
I just bought it, thanks to Jeremy for the fast tip!! And now I have to order the cables, but for now he'll be coming over to my house later today and we'll be hooking up his to see what we can do. For now, here are the pics from the NERDOUT at Tony's house..

Gary following Mr.CHADEMO ;) to Tony's (P.S. I think Gary kept getting pissed every time I said lets rip out the Tesla's unit to put in Jeremy's LOL)
b8307646bb7ad7b9fe42dada908ce937.jpg


Kinda important??
a3211cdb55a4d3add0936d35b1ed8b00.jpg


f17681dcbeed522bfb6c1aafa09c8b7d.jpg


Jeremy-- remember that clip is still down there!!
abdca8cb65d752db6781e73027b4202d.jpg


a07a8d22860467ca4a70e24453cca077.jpg


05711f2b0357c792a6594cdf4887deef.jpg


VICTORY!!!
e05ff16ce630a3fb547f9091c59c0f8a.jpg


c9fe362f19d506527025ffdba4b09e5a.jpg


3e17c0fba1f933044af7b7ef54780775.jpg


e704bf531726767340159ef44df397cb.jpg


Tony checking for the juice before we REALLY start!!
ddcfd12c88224da1425c794570efbed2.jpg


e704bf531726767340159ef44df397cb.jpg


Break time and I'm looking at John's OpenEVSE he did because mine is on its way!!
66745e5246f26dbb4bbaac6fd8100208.jpg


BEAUTIFUL isn't it??
e46b5ff14ba2f5a9f300258190d57c54.jpg


On our initial placement tests and fittings, we did not have the cables hooked up.. WOOPS..
8b4f5cc92ca1e00036ce4ffad941c186.jpg


c287abb37488c94bcb3e716966c1b44d.jpg


Tony goes to town with his mad fab skills.. NOTE HERE, this is a rough 1st. gen template. I have a WaterJet buddy that'll be making us the final versions! :D
630032970e1ef70eb89281e0466bbd1f.jpg


Brake placement is crucial..
d9734d7ea842efdb432f249bdc8f66b1.jpg


And there has to be room for the board...
55d8a36200ddd6750779604ba558ad19.jpg
 
Template being traced out onto T6...
6eca59ef0a840ded8ab596b394c195b0.jpg


And the cutting begins
3acd9fd622fb199d769540bf98d4ecee.jpg


a11f57e876418b3f0444dca80fa33942.jpg


655af1a6b17788593bdb446202d1066f.jpg


I'll post my other pics later..of the final cut version, etc.. have alot more (like 40) and I'll detail the work and where we're at..
 
JeremyW (Lifted from the Encinitas thread) said:
Was a very fun time! :D

Didn't get home till 1:30 am, and had to get up for work at 4:30 am. I didn't fall asleep at work, luckily. ;)
That's a relief, that you were able to drive home after all we did to your LEAF! Were there any parts left over? Did it work the first time?
 
Today was "Work on the Brusa input Harness" day!

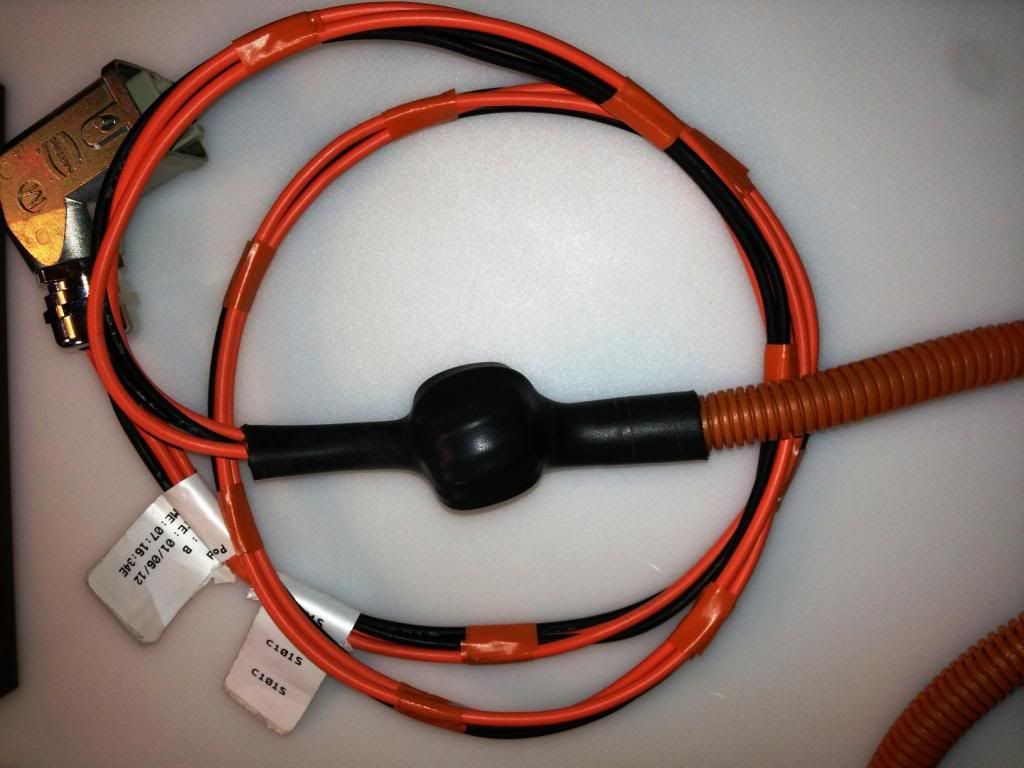
First up... "move the Balun".


There is a Balun located inline on the 2 - 240VAC Hot legs coming from my Brusa Cable J1772 Socket to the input of the Brusa.

On my cable, it was located 4.5' from the Brusa input plug, which would at best be buried in the Orange convoluted tubing of the J1172 , at worst far enough away to be cut off in the splicing process.

00S_zps935a6469.jpg


I noticed on Phil's picture of the early version of the install, that I can see this Balun is there, and relatively close to the Brusa.

SO:
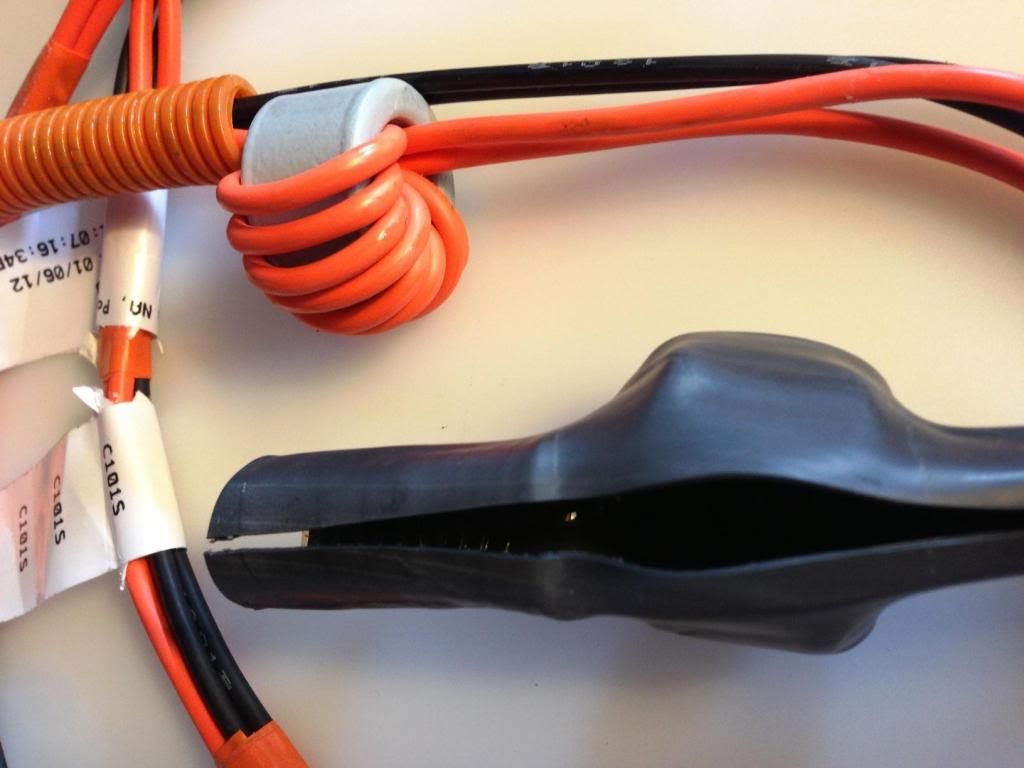
1) I bisected the thick heat shrink tubing surrounding the Balun until I could work it out from this enclosure.

0s_zps7597ae6b.jpg


2) I Then removed all the tape used in the original harness, freeing up the individual conductors.

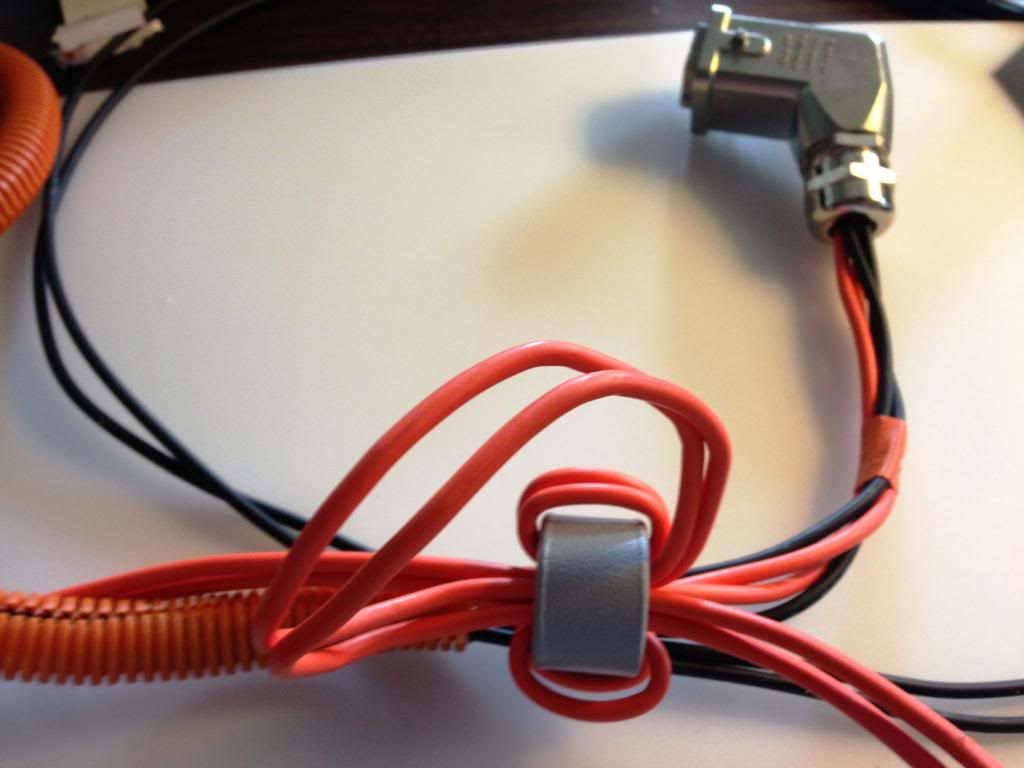
3) I worked the Ferrite ring "up" the conductors until I had it where I wanted it.

1S_zps4064d4d7.jpg


4) I continued moving each of the windings up until it was again tightly wound, with no crossovers.

2S_zpsb0c47608.jpg


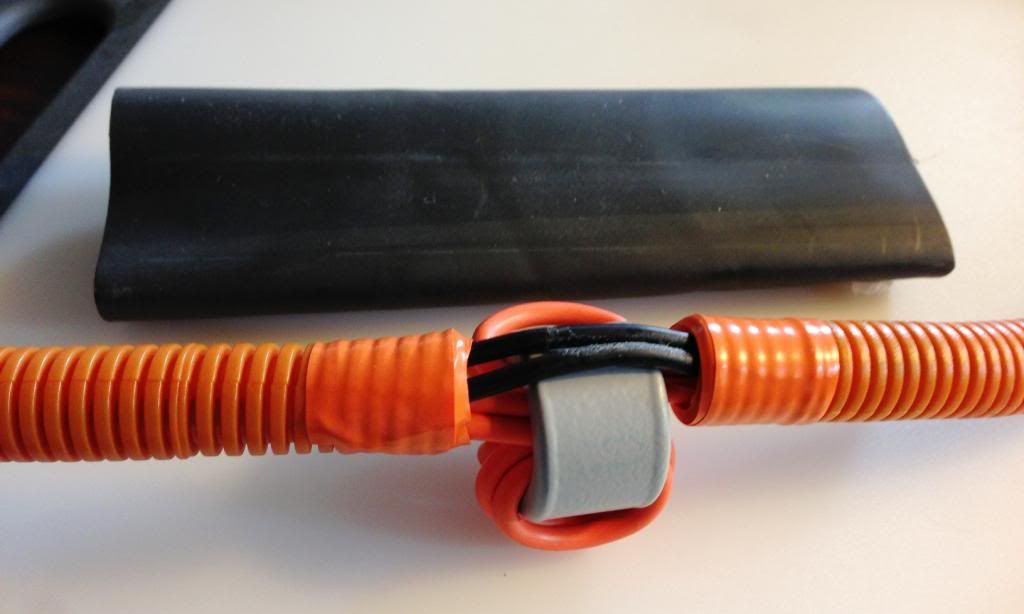
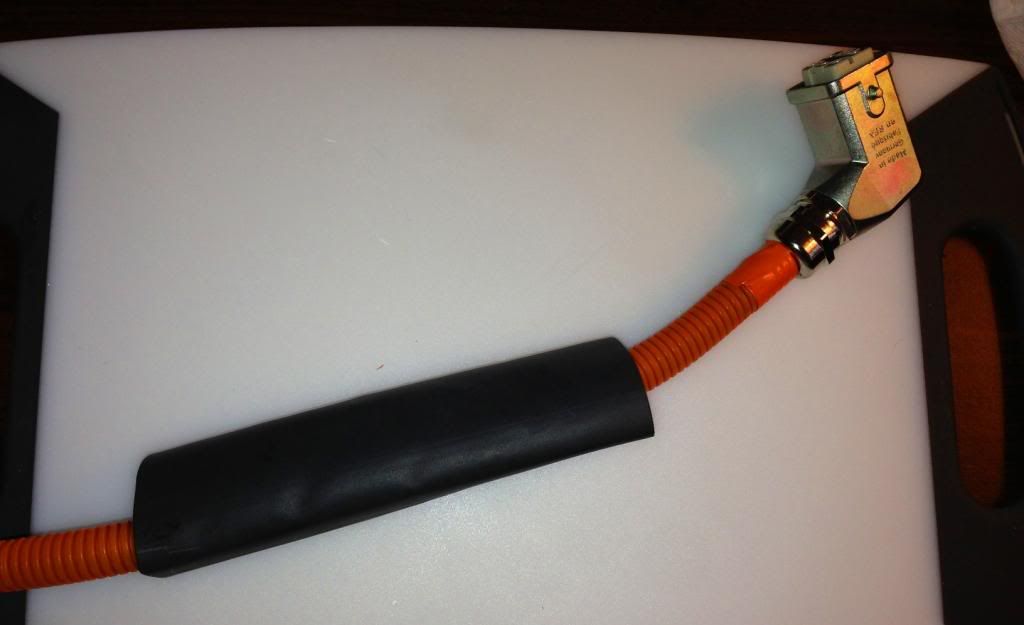
5) I harvested some of the Orange convoluted tubing from the now distal end, and moved it into position between the Balun and the Brusa input plug. (Put a little RTV under it right at the Plug for good measure.)

6) I then had to cut the plug end away from the J1772 end, and I did this at a 4' length.
(too long, but unwilling to commit at this point)

7) I rebuilt the harness somewhat, reapplying tape wraps at about 6" intervals, and moving the orange convoluted tubing up on the other side and into place.

8) I Acquired some 1.5" 3M 3:1 Black heavy Heat shrink tubing with glue (3M™ Heat Shrink Multiple-Wall Polyolefin Tubing EPS400-1.50-48"-Black) , and cut a length that would cover this assembly as before, but also capture both end of the convoluted tubing this time.
(I have some extra 1.5" Heat shrink. It's pretty expensive for the good stuff. You only need about 6", and I had to buy 4'. PM Me if you need a piece)

3S_zpse2575064.jpg


9) Slid it into place, and shrank it down.
It looks like I hoped it would, and it's all ready to accept the Metripack plugs that will join it with the J1772 Harness.

5s_zps2bde19c5.jpg


J 1772 Interface end:

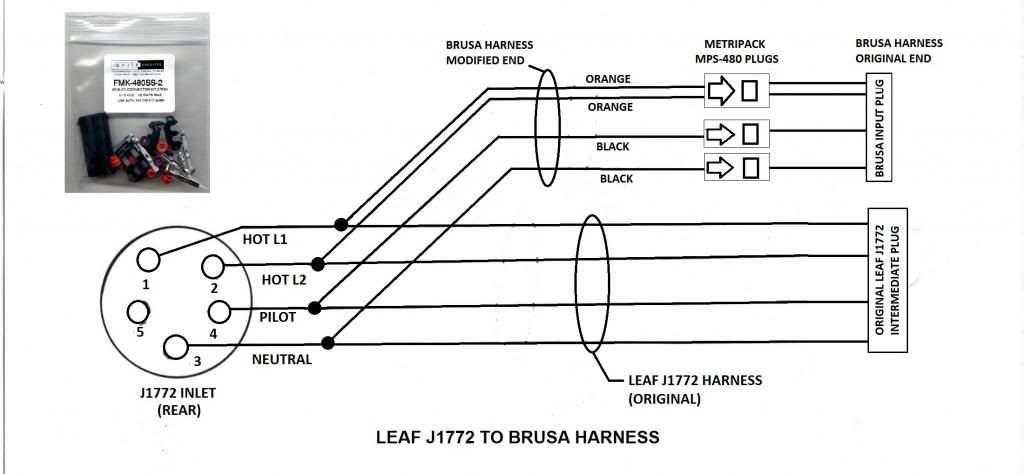
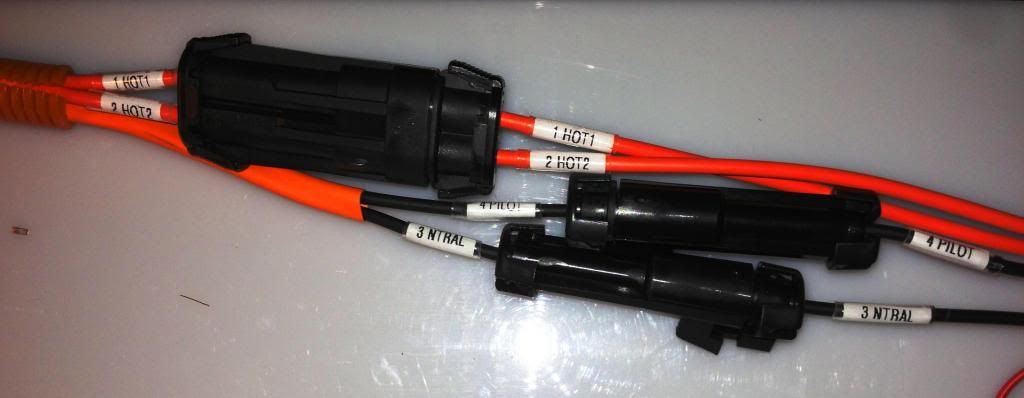
10) Not having access to the J1772 Leaf interface plug (big orange sucker), I need to tap into the 2 Hot Legs, I neutral, and the Pilot conductor, in such a way that my "incursion" can be somewhat hidden, and the Brusa cable can be "quickly" removed in a safe manner.

105.jpg


11) so, I cut into the J1772 Harness conductors "surgically", removing about 1/2" of insulation from each, staggering the connection points about 3/4" so that none of them would line up and abrade the other.

Keep in mind, that the J1772 Harness from the outlet to the intermediate plug only has about 7" or 8" of wire. Things need to be compact if you are going to hide them back under the Orange Tubing.

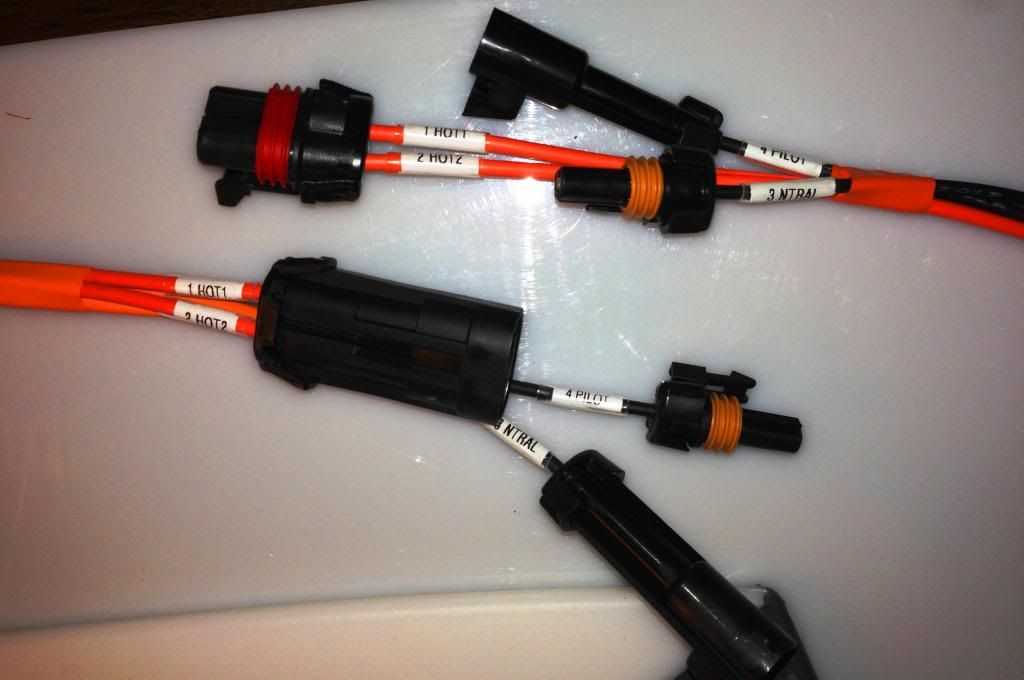
12) I then wrapped the appropriate color wire, now labeled (1, 2, 3 ,4) around the J1772 Conductor, and soldered it fully. I then slid waterproof, adhesive heat shrink tubing over each connection, resulting in 4 new wires paralleling the original Leaf J1772 Harness. I Put them in a short sleeve, creating a new little harness.

12.jpg


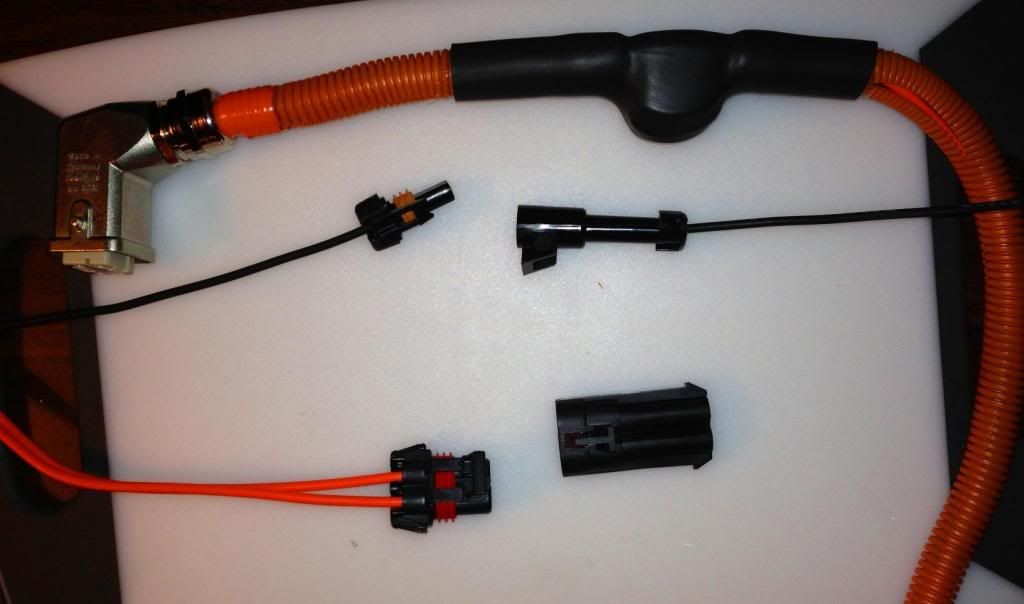
13) So that this would be "reversible" and so that I could quickly remove the Brusa harness, I installed Waterproof Metri-pack 480 connectors on these wires, and on the corresponding wires of the Brusa charger harness.

11.jpg


14) I am now fully "T" tapped into the J1772 Harness, and in seconds, I can unplug the Brusa harness for removal.

IMG_4679.jpg


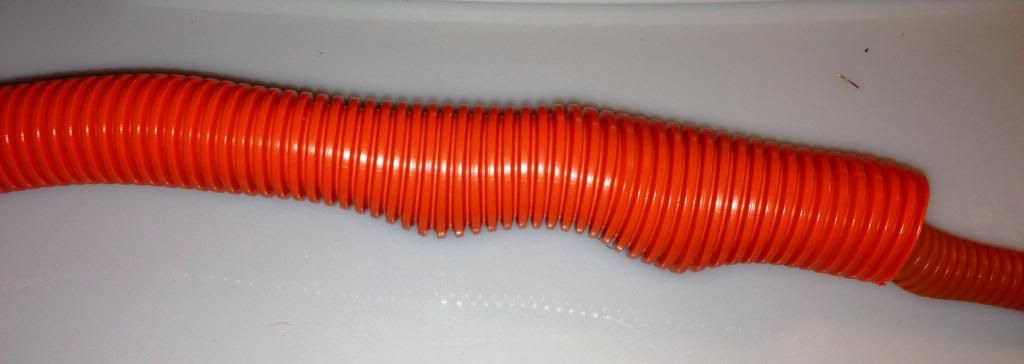
15) To complete the "illusion", I removed the 1" orange convoluted tubing that originally covered the J1772 Harness, and substituted a new, exact match 1.5" orange convoluted tube, which completely conceals all the connections and Metripack plugs.

14.jpg


These Metripack plugs ARE waterproof if done correctly. They come apart with a resounding "Pop".

16) I unplugged the Brusa end, made up blank plugs sealed with RTV to cover the ends of the plugs remaining, and replaced the J1772 Harness, ready for the next step of the installation.
 
I got my Brusa today!!! :D :D :D I'm sooooo jazzed but I need a cable kit now :(

If not I'd get this baby hooked up and flying before the July 7th meet!!

KillaWatt, I'm digging the cable hookups. I've been pondering in my head how to do it clean and neat and was actually thinking of molding a socket to fit the OEM connector that plugs into the Nissan harness.

That way, just buy a J1772 plug and we're all set.
 
JasonA said:
I got my Brusa today!!! :D :D :D I'm sooooo jazzed but I need a cable kit now :(

If not I'd get this baby hooked up and flying before the July 7th meet!!

KillaWatt, I'm digging the cable hookups. I've been pondering in my head how to do it clean and neat and was actually thinking of molding a socket to fit the OEM connector that plugs into the Nissan harness.

That way, just buy a J1772 plug and we're all set.

Hope to see you there!!!

Please register here for the event:

http://bc2bc-party-sjc.eventbrite.com
 
TonyWilliams said:
JasonA said:
I got my Brusa today!!! :D :D :D I'm sooooo jazzed but I need a cable kit now :(

If not I'd get this baby hooked up and flying before the July 7th meet!!

KillaWatt, I'm digging the cable hookups. I've been pondering in my head how to do it clean and neat and was actually thinking of molding a socket to fit the OEM connector that plugs into the Nissan harness.

That way, just buy a J1772 plug and we're all set.

Hope to see you there!!!

Please register here for the event:

http://bc2bc-party-sjc.eventbrite.com

Any chance of you guys streaming it using Google hangout or something for those of us further afield? ;)
 
aminorjourney said:
TonyWilliams said:
JasonA said:
I got my Brusa today!!! :D :D :D I'm sooooo jazzed but I need a cable kit now :(

If not I'd get this baby hooked up and flying before the July 7th meet!!

KillaWatt, I'm digging the cable hookups. I've been pondering in my head how to do it clean and neat and was actually thinking of molding a socket to fit the OEM connector that plugs into the Nissan harness.

That way, just buy a J1772 plug and we're all set.

Hope to see you there!!!

Please register here for the event:

http://bc2bc-party-sjc.eventbrite.com

Any chance of you guys streaming it using Google hangout or something for those of us further afield? ;)

If you're referring to the final rally party at San Juan Capistano, California, I *think* we can get some real cameras there. At least one attendee is a professional in that business. They will have professionals filming at the launch in Blaine, Washington on June 29.
 
TonyWilliams said:
aminorjourney said:
Any chance of you guys streaming it using Google hangout or something for those of us further afield? ;)

If you're referring to the final rally party at San Juan Capistano, California, I *think* we can get some real cameras there. At least one attendee is a professional in that business. They will have professionals filming at the launch in Blaine, Washington on June 29.

Awesome. I *so* need to move to the west coast... Let's hope DOMA and Prop 8 are struck out next week...

(If I do move, I'll be bringing my British Leaf with me :D)
 
aminorjourney said:
(If I do move, I'll be bringing my British Leaf with me :D)

That should be good for a few double takes when you park curbside. I noticed when we had the brake fluid reservoir off whilst fabricating bits for the Brusa charger, the bracket is already set up for left or right hand drive. Definitely a world car.
 
Today was the Output Harness.
Not as involved as the Input harness, in fact, pretty boring... but it had to be done.

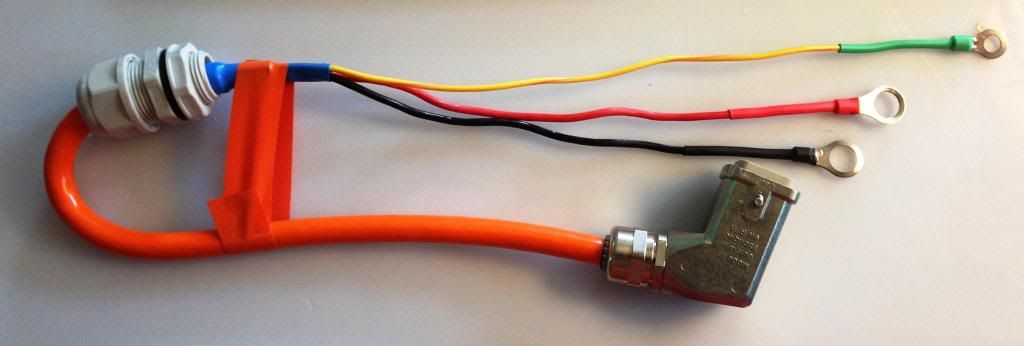
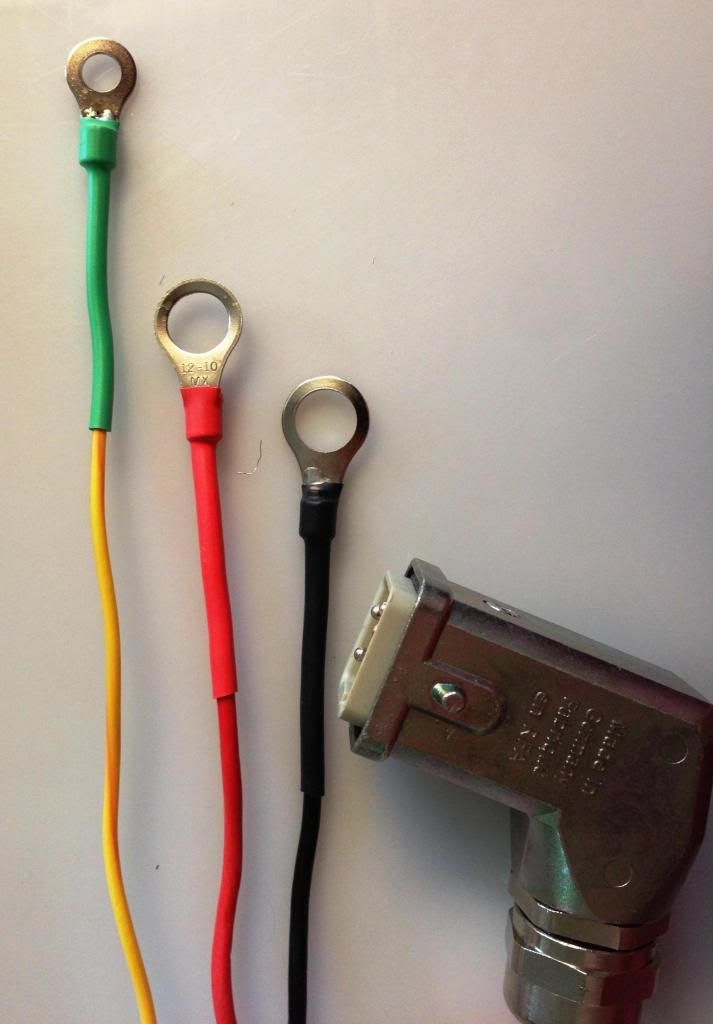
I finally found some heavy duty Ring Terminals.
I'm sure the old Panduit yellow crimp on's would have worked, but I wanted Heavy Duty.
These were SO heavy duty in fact, that my cheapy crimpers wouldn't touch them, and I had to go find the "little" die for the Hydraulic crimpers.
Soldered them on as well.

As much as I LOVE the supplied cable gland (It's stunning :eek: ), I chickened out, and used a plastic unit.
I could just see that metal nut coming loose, and sliding.... down and.... ZAP.

Carried the "ground" along, and will connect it to a bracket mount screw under there.
The leads are longer than they need to be, but I can always make them shorter, and hard to make them longer.

19cc1520-eba7-4a4b-a958-43f8f016c52d.jpg


OUTPUT2.jpg


.
 
KillaWhat said:
Soldered them on as well.
Not a good idea to solder wires in applications where the joint is subject to vibration. Due to solder migration up the wire, it will add stress to the wire and eventually break. If you have a good crimp, solder is not required and will compromise the connection.
 
drees said:
KillaWhat said:
Soldered them on as well.
Not a good idea to solder wires in applications where the joint is subject to vibration. Due to solder migration up the wire, it will add stress to the wire and eventually break. If you have a good crimp solder, is not required and will compromise the connection.
Mega Don't Solder and Crimp Dittos from me on that one.

I've built wiring harnesses for some of the harshest environments "back in the before time", and we didn't solder them. Granted, aerospace quality crimping tools with lab testing helps.
 
TonyWilliams said:
drees said:
KillaWhat said:
Soldered them on as well.
Not a good idea to solder wires in applications where the joint is subject to vibration. Due to solder migration up the wire, it will add stress to the wire and eventually break. If you have a good crimp solder, is not required and will compromise the connection.

Mega Don't Solder and Crimp Dittos from me on that one.

I've built wiring harnesses for some of the harshest environments "back in the before time", and we didn't solder them. Granted, aerospace quality crimping tools with lab testing helps.


I shall make them 3/4" shorter today I guess :oops:
Thanks for the feedback.
 
The only thing I'll add here, and I'll use mine as a test platform as well is that there will be hardly if close to nil vibration because that section is vibration dampened on the main frame and not on the traction system.

So it gets none of the torsional forces and back & forth from the stop & go (and accel/regen) from the drive system. Its dampened so I'd not be too worried about that, and considering there's a liquid-tight fitting holding the cable right along with the top plate movement, I think we're good until Tony gets back and his buddy "the crimpper" in Camarillio can make us some sweet crimps. :D

Otherwise, we're set for some water-jetting this weekend (or tomorrow).. I just bought some T6 plate.. both 3/8 and 1/2 to make some test plates..

Still waiting on my cables from EVTV...
 
Back
Top