Today was "Work on the Brusa input Harness" day!
First up... "move the Balun".
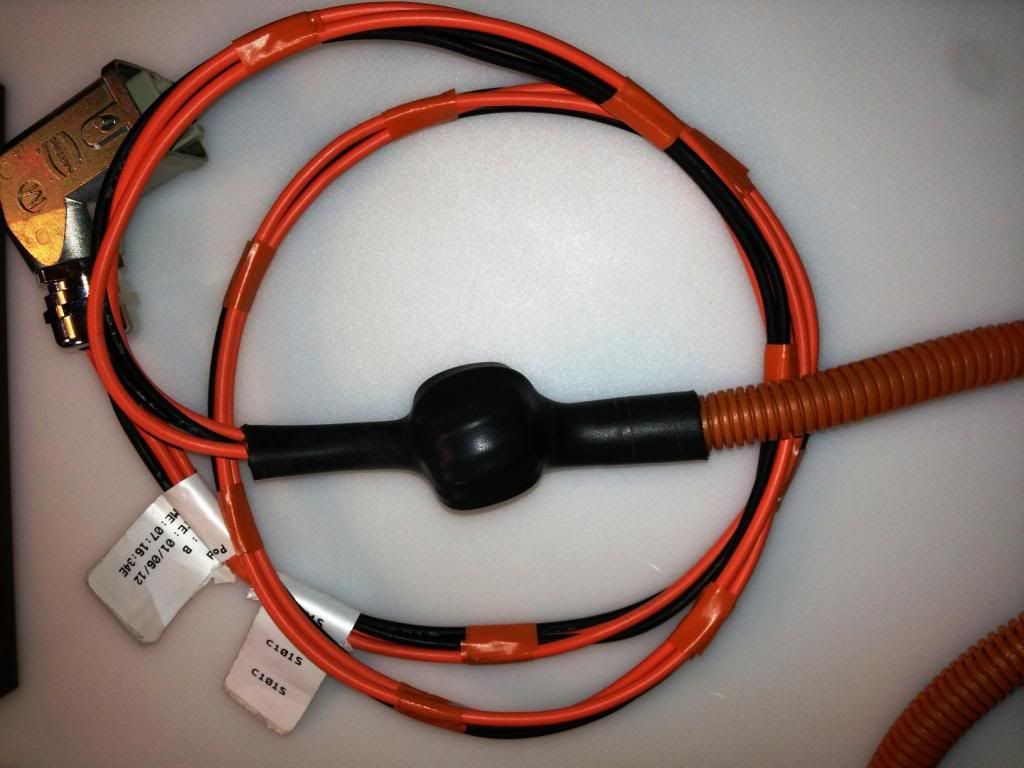
There is a Balun located inline on the 2 - 240VAC Hot legs coming from my Brusa Cable J1772 Socket to the input of the Brusa.
On my cable, it was located 4.5' from the Brusa input plug, which would at best be buried in the Orange convoluted tubing of the J1172 , at worst far enough away to be cut off in the splicing process.
I noticed on Phil's picture of the early version of the install, that I can see this Balun is there, and relatively close to the Brusa.
SO:
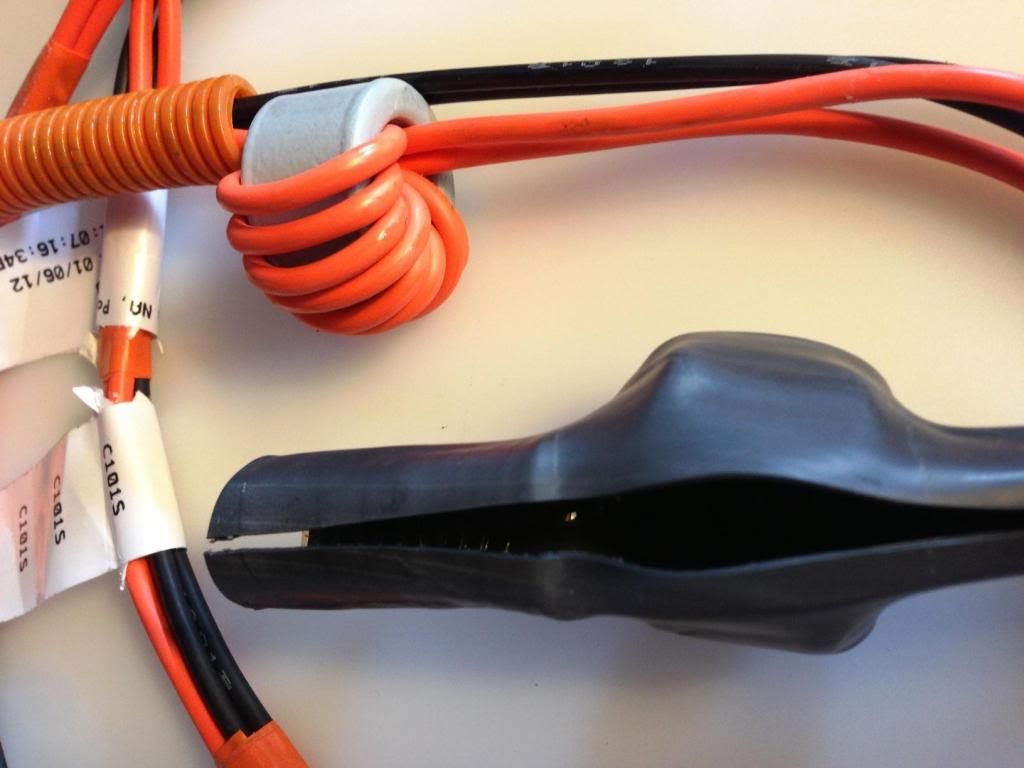
1) I bisected the thick heat shrink tubing surrounding the Balun until I could work it out from this enclosure.
2) I Then removed all the tape used in the original harness, freeing up the individual conductors.
3) I worked the Ferrite ring "up" the conductors until I had it where I wanted it.
4) I continued moving each of the windings up until it was again tightly wound, with no crossovers.
5) I harvested some of the Orange convoluted tubing from the now distal end, and moved it into position between the Balun and the Brusa input plug. (Put a little RTV under it right at the Plug for good measure.)
6) I then had to cut the plug end away from the J1772 end, and I did this at a 4' length.
(too long, but unwilling to commit at this point)
7) I rebuilt the harness somewhat, reapplying tape wraps at about 6" intervals, and moving the orange convoluted tubing up on the other side and into place.
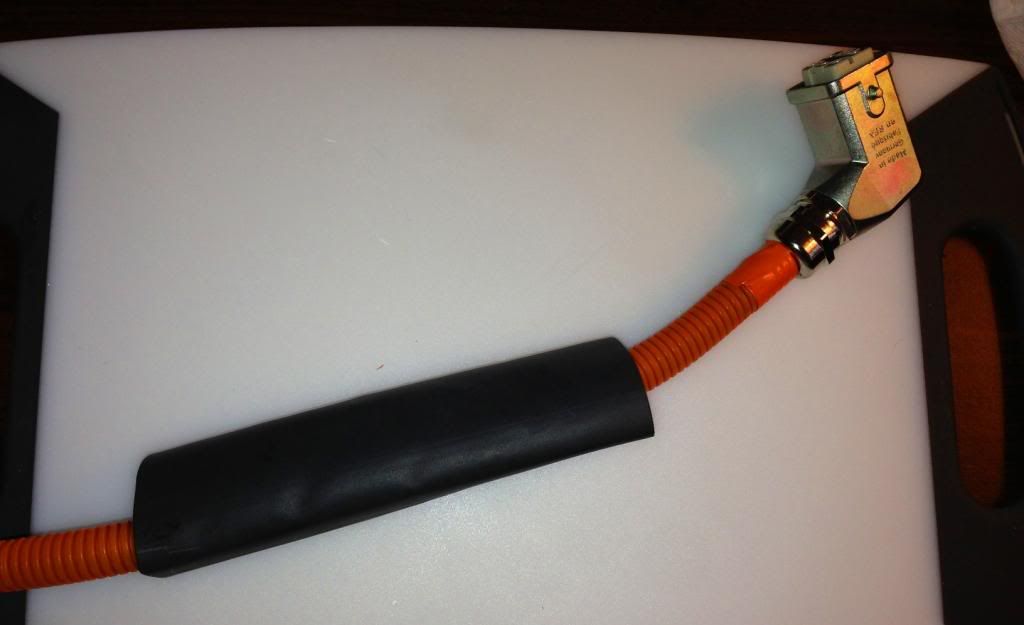
8) I Acquired some 1.5" 3M 3:1 Black heavy Heat shrink tubing with glue (3M™ Heat Shrink Multiple-Wall Polyolefin Tubing EPS400-1.50-48"-Black) , and cut a length that would cover this assembly as before, but also capture both end of the convoluted tubing this time.
(I have some extra 1.5" Heat shrink. It's pretty expensive for the good stuff. You only need about 6", and I had to buy 4'. PM Me if you need a piece)
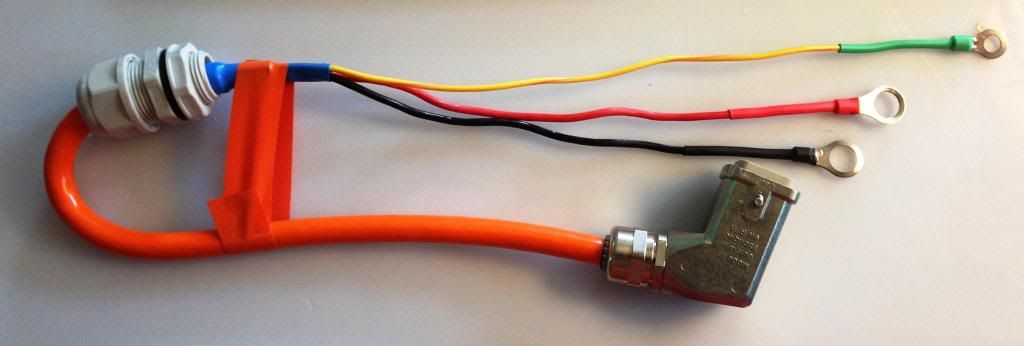
9) Slid it into place, and shrank it down.
It looks like I hoped it would, and it's all ready to accept the Metripack plugs that will join it with the J1772 Harness.
J 1772 Interface end:
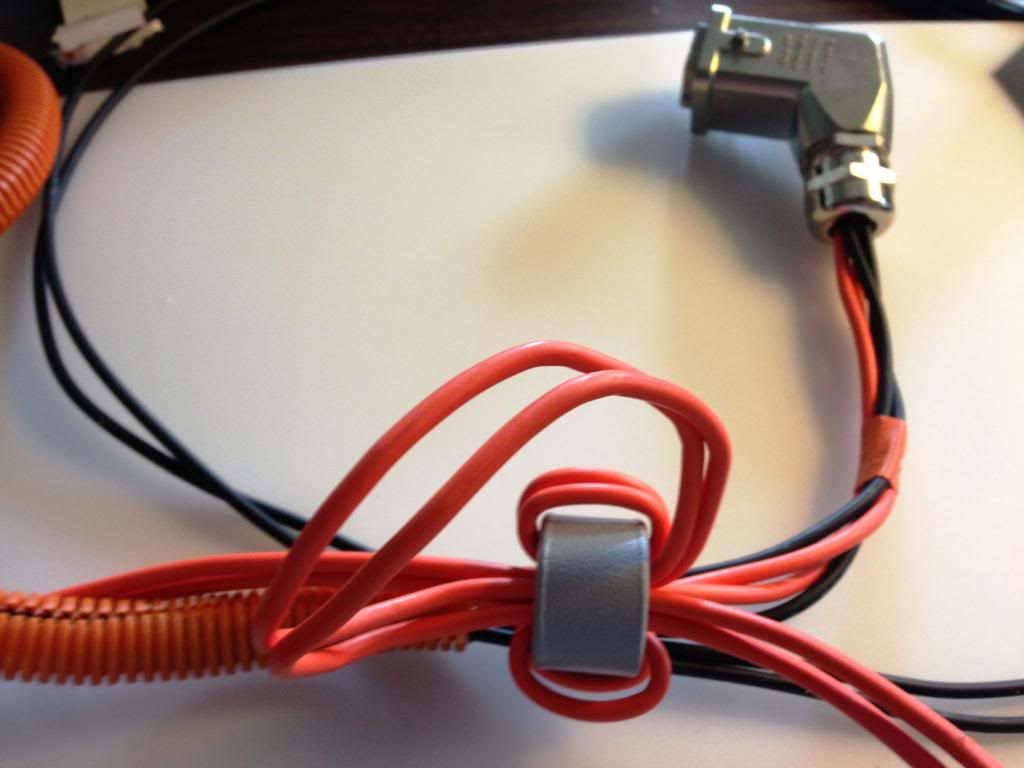
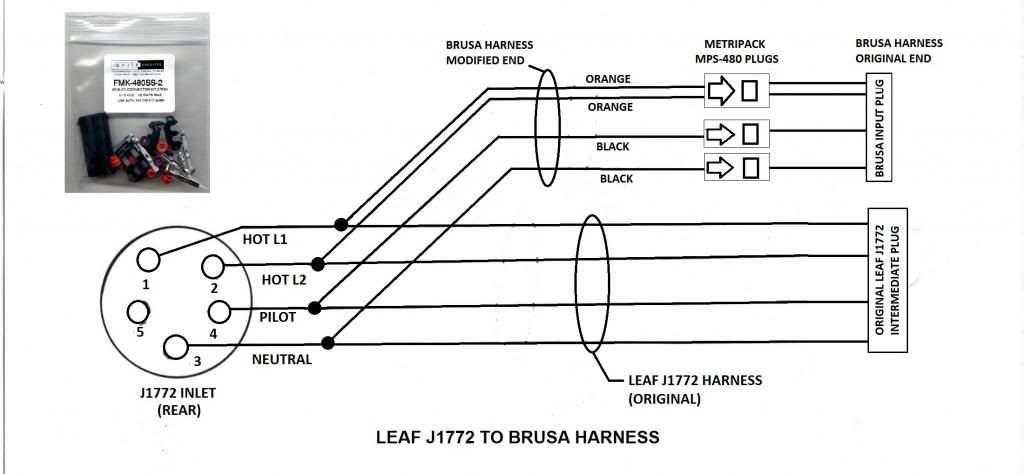
10) Not having access to the J1772 Leaf interface plug (big orange sucker), I need to tap into the 2 Hot Legs, I neutral, and the Pilot conductor, in such a way that my "incursion" can be somewhat hidden, and the Brusa cable can be "quickly" removed in a safe manner.
11) so, I cut into the J1772 Harness conductors "surgically", removing about 1/2" of insulation from each, staggering the connection points about 3/4" so that none of them would line up and abrade the other.
Keep in mind, that the J1772 Harness from the outlet to the intermediate plug only has about 7" or 8" of wire. Things need to be compact if you are going to hide them back under the Orange Tubing.
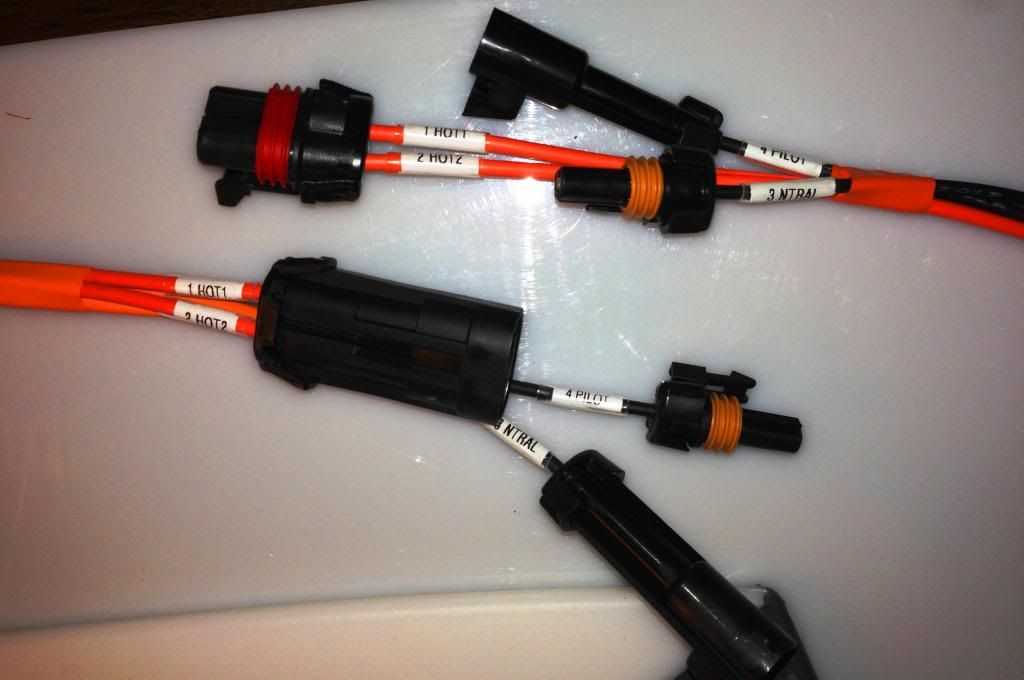
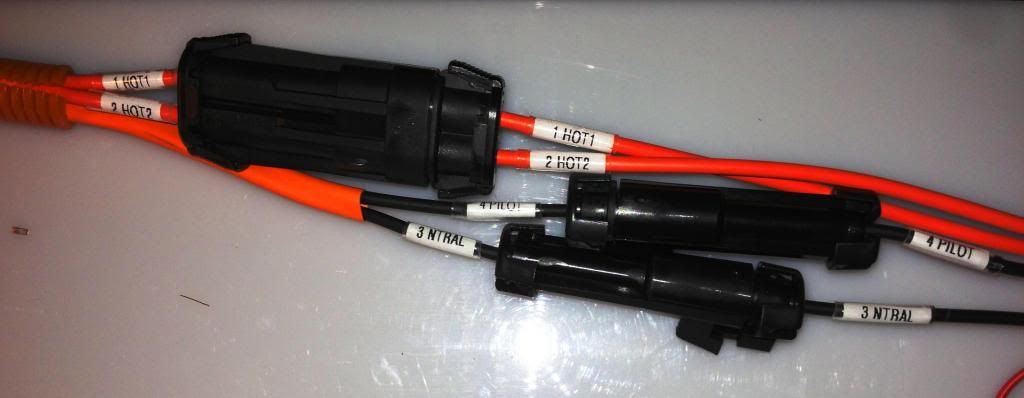
12) I then wrapped the appropriate color wire, now labeled (1, 2, 3 ,4) around the J1772 Conductor, and soldered it fully. I then slid waterproof, adhesive heat shrink tubing over each connection, resulting in 4 new wires paralleling the original Leaf J1772 Harness. I Put them in a short sleeve, creating a new little harness.
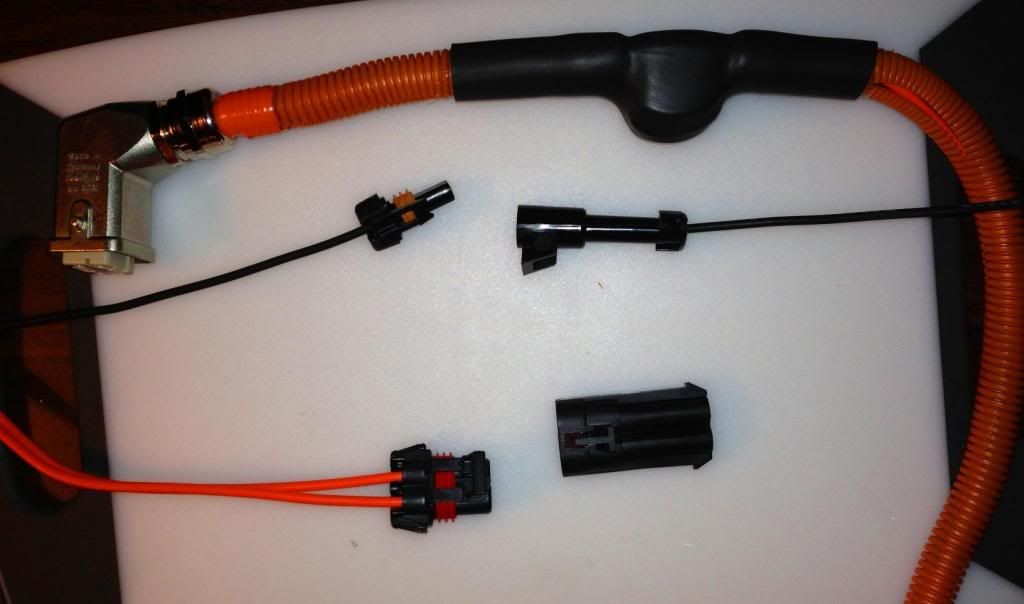
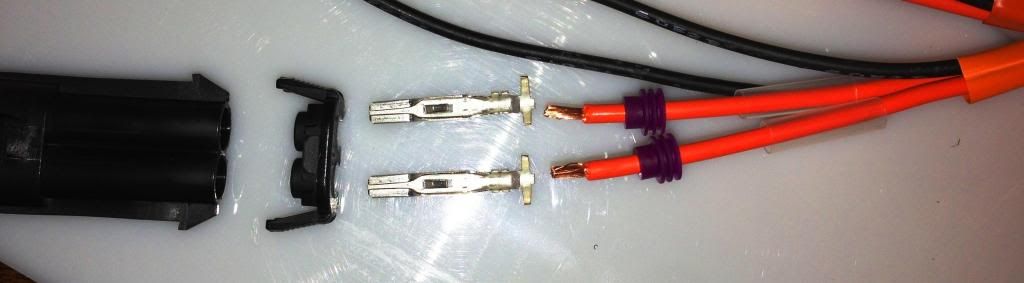
13) So that this would be "reversible" and so that I could quickly remove the Brusa harness, I installed Waterproof Metri-pack 480 connectors on these wires, and on the corresponding wires of the Brusa charger harness.
14) I am now fully "T" tapped into the J1772 Harness, and in seconds, I can unplug the Brusa harness for removal.
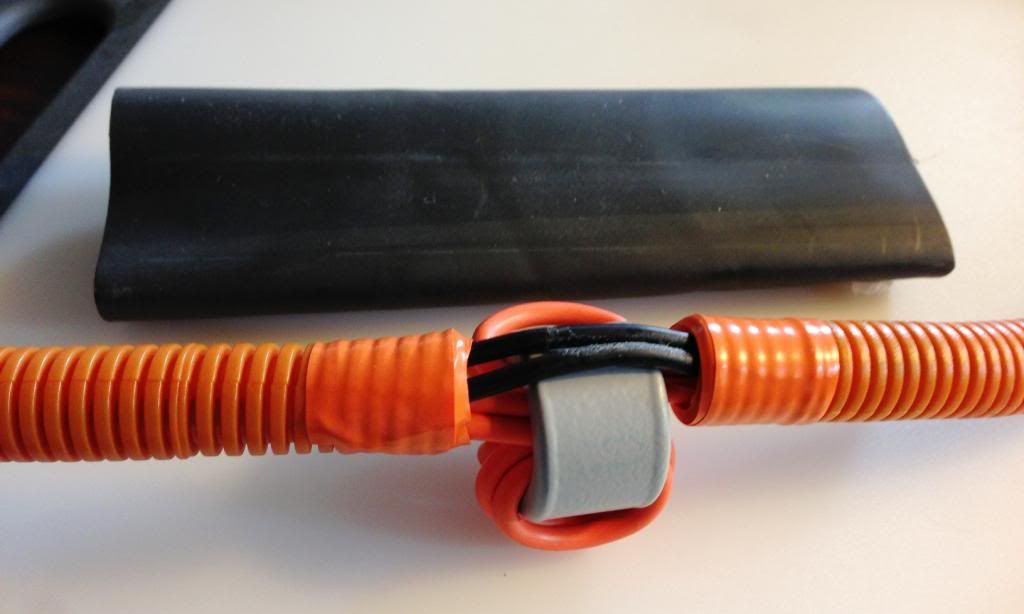
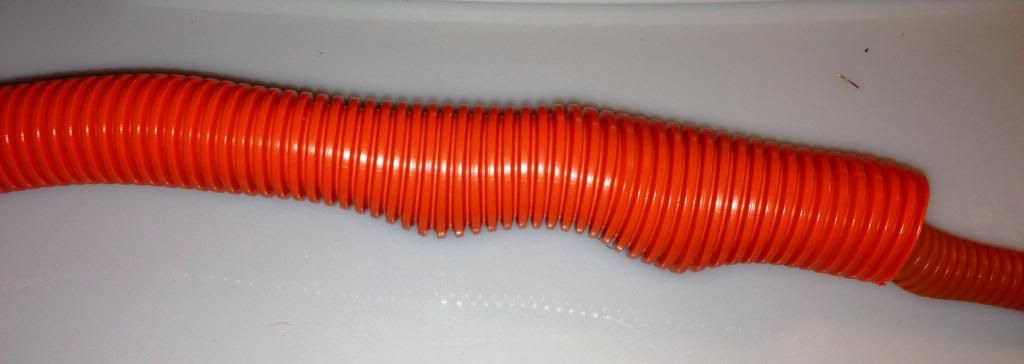
15) To complete the "illusion", I removed the 1" orange convoluted tubing that originally covered the J1772 Harness, and substituted a new, exact match 1.5" orange convoluted tube, which completely conceals all the connections and Metripack plugs.
These Metripack plugs ARE waterproof if done correctly. They come apart with a resounding "Pop".
16) I unplugged the Brusa end, made up blank plugs sealed with RTV to cover the ends of the plugs remaining, and replaced the J1772 Harness, ready for the next step of the installation.


") to Tony's (P.S. I think Gary kept getting pissed every time I said lets rip out the Tesla's unit to put in Jeremy's LOL)
to Tony's (P.S. I think Gary kept getting pissed every time I said lets rip out the Tesla's unit to put in Jeremy's LOL)